Was the Wipe on used straight out of the Can?? Or did you thin it some? If so what did you thin it with?
Very nice looking body and finish. Keep the pictures coming!!
I'm back baby! Jazzblaster Build - Finished Pg 4
-
geoman

- PAT. # 2.972.923

- Posts: 66
- Joined: Wed Feb 17, 2016 12:49 pm
-
d-rock

- PAT. # 2.972.923
- Posts: 1181
- Joined: Mon Apr 28, 2008 5:11 am
- Location: Atlanta
Re: I'm back baby! Natural Jazzmaster Partscaster Build
Thanks! I just used it straight out of the can with an old rag. The key is to apply very thin coats. Each application was so thin that it would almost dry to the touch before I finished the entire top. You can do 2-3 coats in one day.
I've used polyurethane before to seal furniture. If you buy the regular stuff and brush it on, it will get very thick and streaky very quickly. The Wipe On product is really nice.
-
tequila_in_teacups

- PAT. # 2.972.923
- Posts: 325
- Joined: Tue Apr 21, 2020 1:23 am
- Location: Aotearoa me Te Waipounamu New Zealand
-
d-rock
- PAT. # 2.972.923
- Posts: 1181
- Joined: Mon Apr 28, 2008 5:11 am
- Location: Atlanta
Re: I'm back baby! Natural Jazzmaster Partscaster Build
I raided the parts drawer and found all this...I'm surprised I had some much laying around

Got a little more work in. I started squaring off the back of the tremolo route

Bridge thimble holes were tight, I tried sanding them out but I needed to break out the rounded file. I did just a little at a time so that I didn't over enlarge them. I wanted the thimbles to be snug but didn't want to force them too much

I also installed the ground wires. One to a bridge thimble, one to the trem cavity. Thankful that the Saylor body had both of those spots drilled to fish the wires through with ease. I found a little bit of copper tape in the parts drawer to keep it in place

Thimbles and trem installed

Got a little more work in. I started squaring off the back of the tremolo route
Bridge thimble holes were tight, I tried sanding them out but I needed to break out the rounded file. I did just a little at a time so that I didn't over enlarge them. I wanted the thimbles to be snug but didn't want to force them too much
I also installed the ground wires. One to a bridge thimble, one to the trem cavity. Thankful that the Saylor body had both of those spots drilled to fish the wires through with ease. I found a little bit of copper tape in the parts drawer to keep it in place
Thimbles and trem installed
-
geoman
- PAT. # 2.972.923
- Posts: 66
- Joined: Wed Feb 17, 2016 12:49 pm
Re: I'm back baby! Natural Jazzmaster Partscaster Build
Thanks for the info on using the Wipe-ons!! The finish looks great!! What pickups do you have for this one? And will you wire it with 1K pots?
Last edited by geoman on Tue Feb 23, 2021 8:54 pm, edited 1 time in total.
-
d-rock
- PAT. # 2.972.923
- Posts: 1181
- Joined: Mon Apr 28, 2008 5:11 am
- Location: Atlanta
Re: I'm back baby! Natural Jazzmaster Partscaster Build
Thanks! I originally was thinking going WRHB but with my budget, I can't spend $400 or so for a boutique set.
Looking in the mid priced range I found great reviews on Golden Age Parsons Street humbuckers. They run $120 for a set of Alnico V's. My 335 has Alnico II Classic 57 pickups which are my favorite pickups. They say the V's will be a bit crisper and tighter. This will give the project more of a Fano JM6 vibe, which is cool for me. I've always loved those. I'll be using 500k pots.

-
d-rock
- PAT. # 2.972.923
- Posts: 1181
- Joined: Mon Apr 28, 2008 5:11 am
- Location: Atlanta
Re: I'm back baby! Natural Jazzmaster Partscaster Build
Since I have time waiting on parts and the neck, I kept looking at the forearm contour thinking you're absolutely right. It needs even more of a roundover to look more jazzmastery. So I got back out the sandpaperpowerdroid wrote: ↑Wed Feb 17, 2021 1:14 amNice project! I know you're already started on the finish work, but may I suggest bigger roundover on the body, plus deeper belly cut and arm countour to help reduce some of the weight? Instead of the swimming pool route you've mentioned, and also to get more of the jazzmaster look and feel?

-
MirageIndigo

- PAT PEND

- Posts: 42
- Joined: Sun Oct 25, 2020 6:09 pm
Re: I'm back baby! Natural Jazzmaster Partscaster Build
The Stewmac golden age HBs sound really really good for the price. Also check out Gepetto Guitar's camelot pickups. I just put a set in my 335/LP hybrid equivalent and they sound great (although I needed to trim screw side screws down to length). Also very good for the price.
That's a great trick on the grounding wire, I'm going to have to steal that technique on the Our Lady or Perpetual Jazz build.
That's a great trick on the grounding wire, I'm going to have to steal that technique on the Our Lady or Perpetual Jazz build.
-
d-rock
- PAT. # 2.972.923
- Posts: 1181
- Joined: Mon Apr 28, 2008 5:11 am
- Location: Atlanta
Re: I'm back baby! Natural Jazzmaster Partscaster Build
Finished up the forearm cut. I think it looks pretty curvy now.

Snapped a few pics trying to get the angle of the contours


I also got in a used Decoboom pickguard that fits the neck pocket perfectly. I had to take a mockup shot. This thing is starting to look like a hybrid of a JM, Non-Reverse Firebird, and Fano JM6 to me.

Snapped a few pics trying to get the angle of the contours
I also got in a used Decoboom pickguard that fits the neck pocket perfectly. I had to take a mockup shot. This thing is starting to look like a hybrid of a JM, Non-Reverse Firebird, and Fano JM6 to me.
-
rosecoloredboy
- PAT PEND
- Posts: 8
- Joined: Tue Mar 02, 2021 12:06 pm
Re: I'm back baby! Natural Jazzmaster Partscaster Build
looks awesome!! i’m totally a fan of JMs with regular humbuckers...definitely want a Wide Range one for myself soon though.
i may only have one jazzmaster...
but i want more
but i want more
-
d-rock
- PAT. # 2.972.923
- Posts: 1181
- Joined: Mon Apr 28, 2008 5:11 am
- Location: Atlanta
Re: I'm back baby! Natural Jazzmaster Partscaster Build
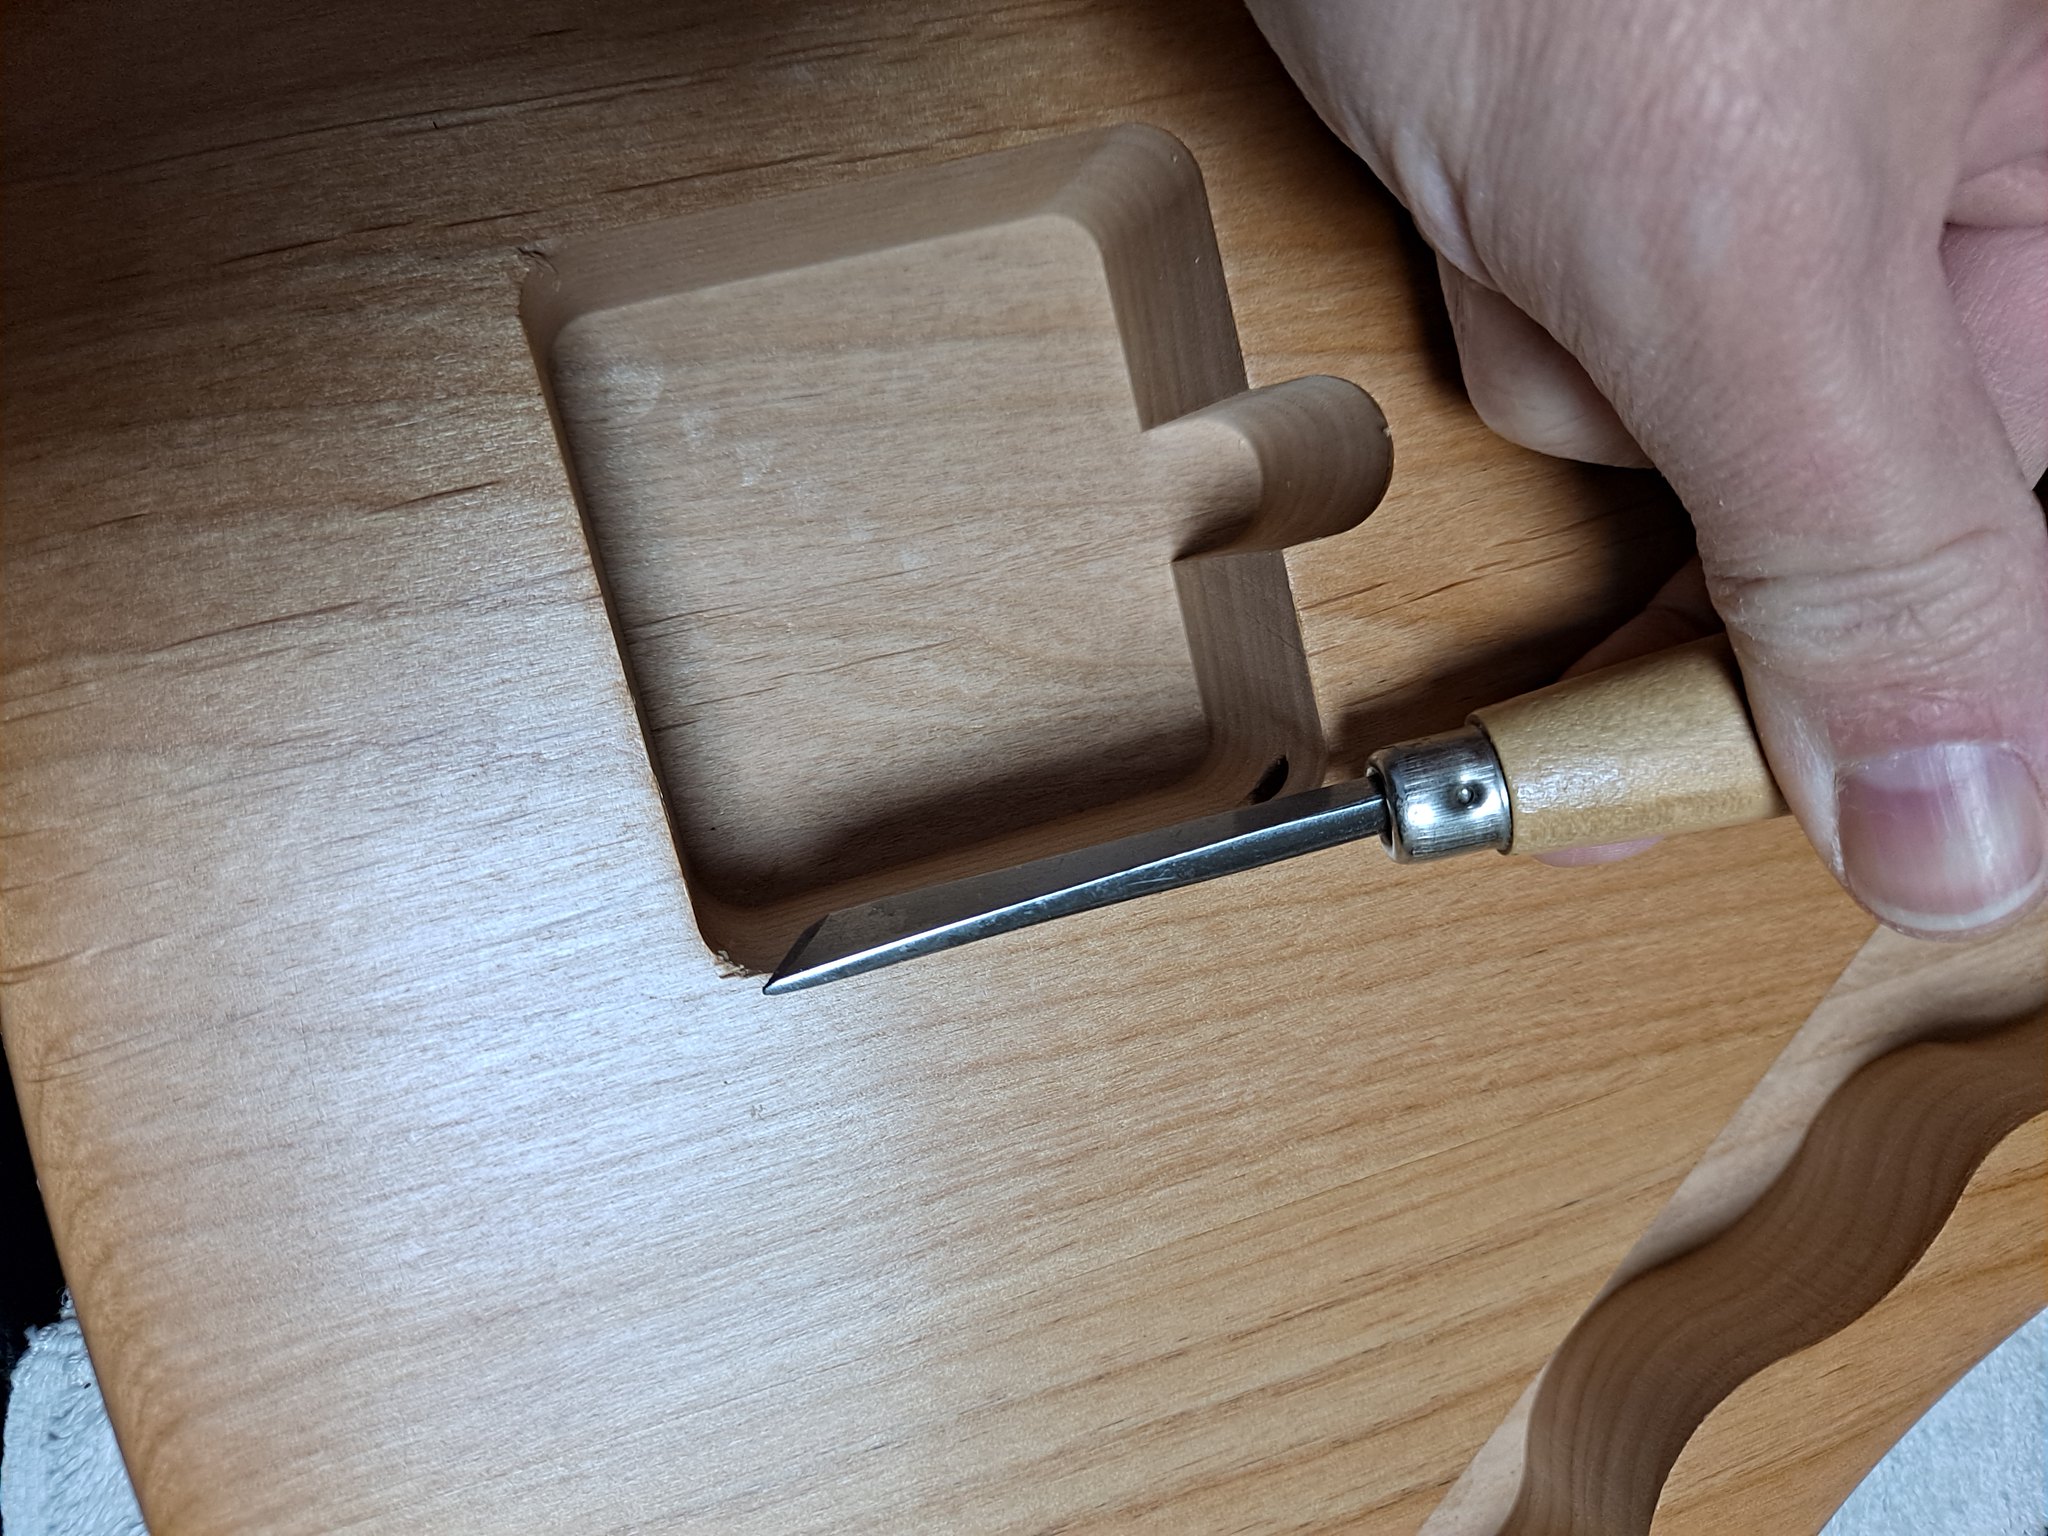
Now that I got the pickguard in I can figure out how I need to mount the pickups. I needed to clear some space to fit the humbucker mounting feet and screws. I don't have a router, so I had to break out my chisels again. Fair warning, this is not for the faint of heart. 
First I marked where I needed to take out some wood

Then I *very carefully* took to carving. I went slow and tried to be as neat as possible. Not as bad as some chisel jobs I've seen.

You can see how the bottom of the pickup sits now

First I marked where I needed to take out some wood
Then I *very carefully* took to carving. I went slow and tried to be as neat as possible. Not as bad as some chisel jobs I've seen.
You can see how the bottom of the pickup sits now
Last edited by d-rock on Wed Mar 24, 2021 9:23 am, edited 1 time in total.
-
snarf

- PAT. # 2.972.923
- Posts: 172
- Joined: Sun Jun 14, 2020 7:04 am
Re: I'm back baby! Natural Jazzmaster Partscaster Build
The contours look nicely done and very clean! Did you use rasp or other tool for rounding off the edges and contouring?
I have a very raw body and need to do exactly the same thing, but can tell it takes a lot time and energy that I do not have
I have a very raw body and need to do exactly the same thing, but can tell it takes a lot time and energy that I do not have
-
d-rock
- PAT. # 2.972.923
- Posts: 1181
- Joined: Mon Apr 28, 2008 5:11 am
- Location: Atlanta
Re: I'm back baby! Natural Jazzmaster Partscaster Build
Thanks! I didn't use a rasp, just sandpaper. I started with 120 and worked to 400 grit.
-
ohm-men

- Expat

- Posts: 4333
- Joined: Tue Sep 26, 2006 5:01 am
- Location: Belgium
- Contact:
Re: I'm back baby! Natural Jazzmaster Partscaster Build
Looks very nice! Looking forward to see the finished product! 
Quiet a nice woodgrain on the body too, looks really great with the natural finish.
Quiet envious on you chissel skills as well...Mine never turn out that tidy
Quiet a nice woodgrain on the body too, looks really great with the natural finish.
Quiet envious on you chissel skills as well...Mine never turn out that tidy
-
d-rock
- PAT. # 2.972.923
- Posts: 1181
- Joined: Mon Apr 28, 2008 5:11 am
- Location: Atlanta
Re: I'm back baby! Natural Jazzmaster Partscaster Build
I just got confirmation that Warmoth has finished and shipped the neck! This is the last piece I'm waiting on.
In the meantime, I have been looking at this thing and felt that the upper horn looked a little bare. I had ordered a inexpensive pickguard off Ebay from China for like $15 including shipping. It was for an MIJ body and this Saylor body is to US specs. I figured I'd try an experiment to see if I liked a different arrangement. I cut a hole in the upper horn for the 3-way toggle, found some white hole plugs on Amazon for the lower horn, and took the Dremel to the pickguard around the bridge posts. The pickguard and controls look more balanced and intentional to my eye, at least.
I also decided to splurge and jumped on a lightly used Descendant vibrato. I went with that over the Mastery because I liked the idea of changing the arm tension without having to unscrew the whole unit. Another plus is that it's lighter in weight.