I like your Talmans
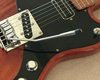
This is close to your original idea for a green one
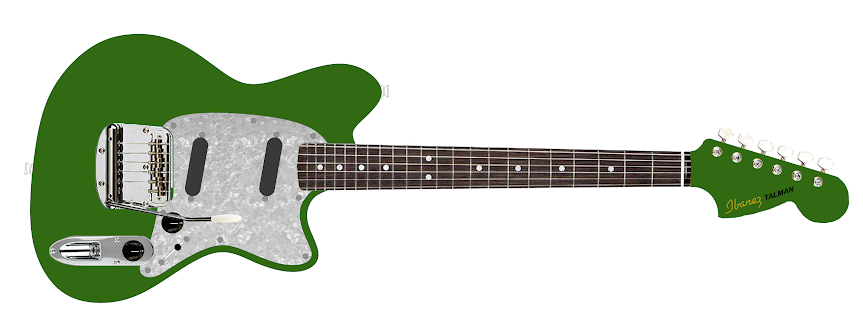
here's mine


Top and back will be thinner sheets of maple veneer plywood. The top will be bound and have a fuschia sparkle paint job.Shadoweclipse13 wrote: ↑Sun Aug 19, 2018 9:32 pmThat's gonna be awesome!! What are you thinking for the top material? Fuscia with a guard?
Aww yeahThePearDream wrote: ↑Mon Aug 20, 2018 5:37 amTop and back will be thinner sheets of maple veneer plywood. The top will be bound and have a fuschia sparkle paint job.


Just a friendly PSA for the folks following along, swapping poles like this should only be done on plastic bobbin pickups, never on pickups which wind the coil on the magnets like Fender does, it will destroy the pickup.ThePearDream wrote: ↑Thu Aug 23, 2018 7:22 pmTo switch out the slugs, I set the new slug on the existing, letting the magnets tell me when they were positioned with the correct polarity for that coil. Then I gently pressed the new slug in place, pushing out the old one
You may be right. I will leave them high initially though. It will be easy to lower them if needed.epizootics wrote: ↑Fri Aug 24, 2018 12:47 pmLooking real good indeed!
My two cents again - I would push the protruding pole pieces a bit further down, as having them sticking out so high above the bobbin can be 'detrimental to the sound', which is of course a purely subjective matter, but I find that having the bobbin closer to the strings keeps the sound more focused...
Yes, definitely don't do this with non plastic bobbin pickups. No worries about the pedantry, I did use the wrong term.oid wrote: ↑Fri Aug 24, 2018 1:07 pmJust a friendly PSA for the folks following along, swapping poles like this should only be done on plastic bobbin pickups, never on pickups which wind the coil on the magnets like Fender does, it will destroy the pickup.
Been enjoying following this thread, good work.
Can't help myself, got to be pedantic, a slug is the the steel pole in in a humbucker or p-90 that uses bar magnets underneath, it is not magnetic, these would just be magnets, they are both poles but only one is magnetic.
I did try, sometimes I hope to get proven wrong when I feed such compulsions.
Keep it up!