Jazzmaster Bass IV Build #2

Talk about modding or building your own guitar from scratch.
User avatar
boss302bass
PAT. # 2.972.923
PAT. # 2.972.923
Posts: 639
Joined: Mon Apr 13, 2009 5:25 am
Location: UK

Jazzmaster Bass IV Build #2

Post by boss302bass » Thu Nov 16, 2017 2:56 pm

Jazzmaster Bass IV Build #2

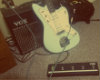
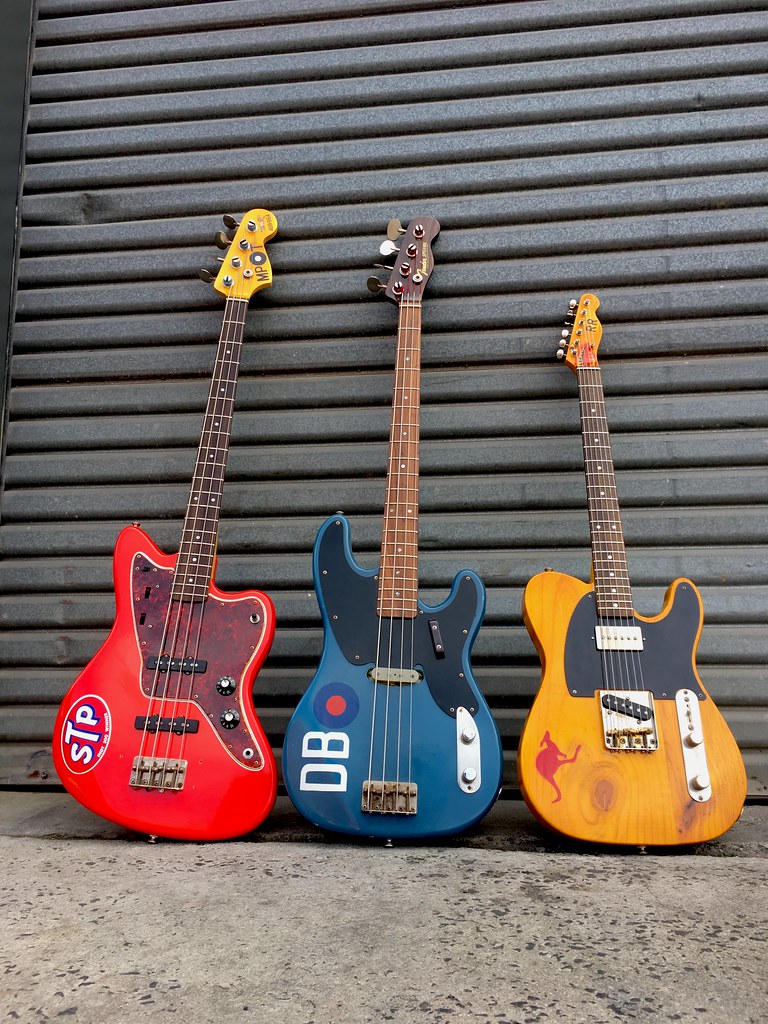
Following on from the first JM IV I built earlier this year, which is currently available for sale, I figured I'm gonna want to keep a JM IV to take with me when I move to the UK next month. It will be good to have alongside the Spitfire Bass - which is a single coil/single pickup platform.
The series/parallel config is so great and is the most bass fun you can have without a pre-amp, and having a spare pair of old Jazz bass pickups and most of the other hardware lying around has made it an easy decision.
Going into my 7th build, I have got body construction down a bit quicker - from cutting out from the blank to hitting the paint booth was about 6 hours. Fast for me! (There was a fair bit of maths and French curve tomfoolery in the first hour, because I want to make sure this one fits into a standard Fender Bass case! JM IV #1 ended up in a slightly longer case - it literally ended up one inch too long LOL)
Finally Paul's (stereordinary) excellent acrylic templates have been getting a workout, and between using both the body and pickguard templates as french curves, David who runs the workshop and me, we came up with a slightly tweaked planshape that will fit into a standard Fender case and still be the full 34" scale. I did get close to giving up and going for a P Bass build...but giving up's for pussies right?

Image

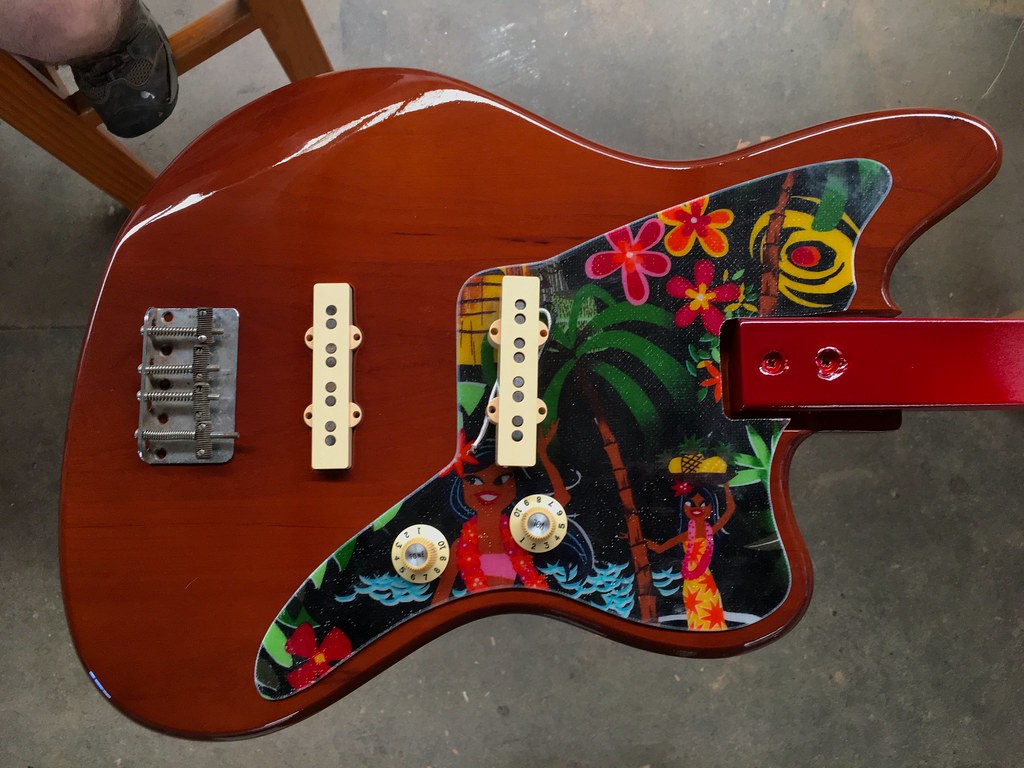
Getting the 60's Jazz bass pickup spacing in and working it around the pickguard was easy for the red JM IV, but this new build required more thought, as I didn't have any thoughts on the bass' overall length fist time round. The neck pocket of course had to be deeper south in the body. Doing this also forced a change in the pickups I wanted - I was all ready to build a pair of Jazzmaster wide flat bass pickups using 8 magnets a la a Jazz Bass pickup, but the re-working of the Jazzmaster body meant that there simply wasn't enough room on the pickguard to make two wide flat pickups fit in and a) look OK and b) work sonically as a pair. So it was decided to go with the Jazz Bass pickups again for build #2. One day I'll make JM Bass pickups and make the design fit into this body and tweak the pickguard outline but I've only got a few weeks to get this build done and ready to leave with me.

Image
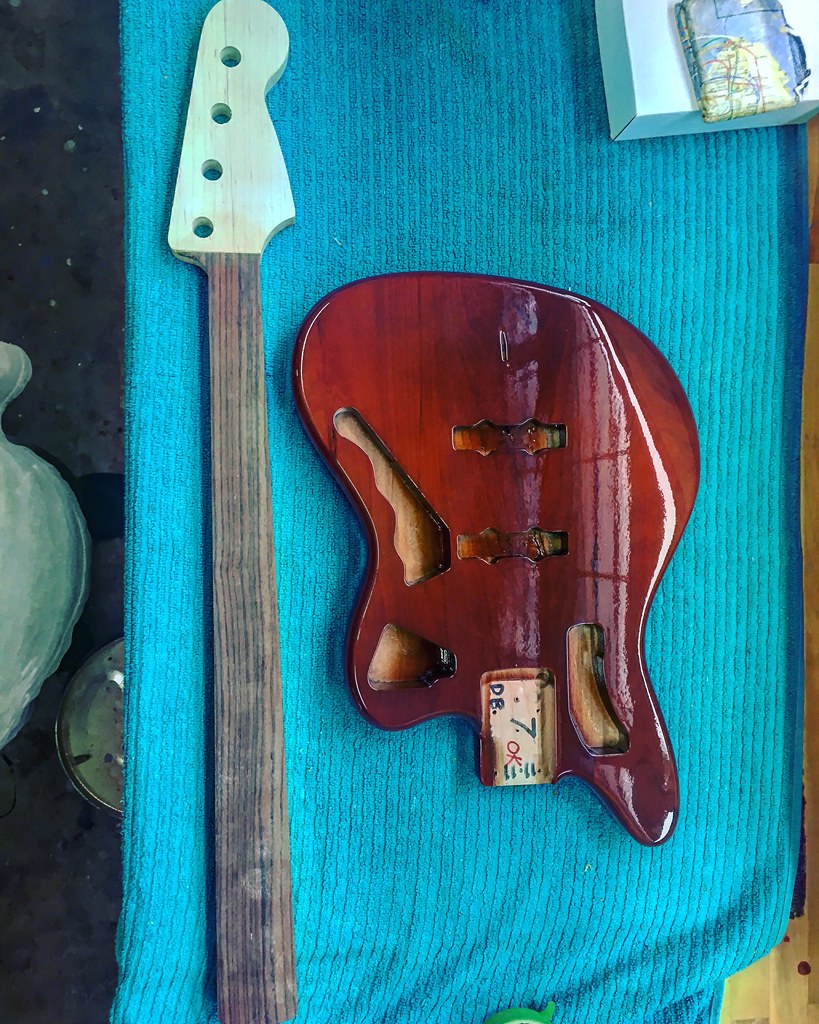
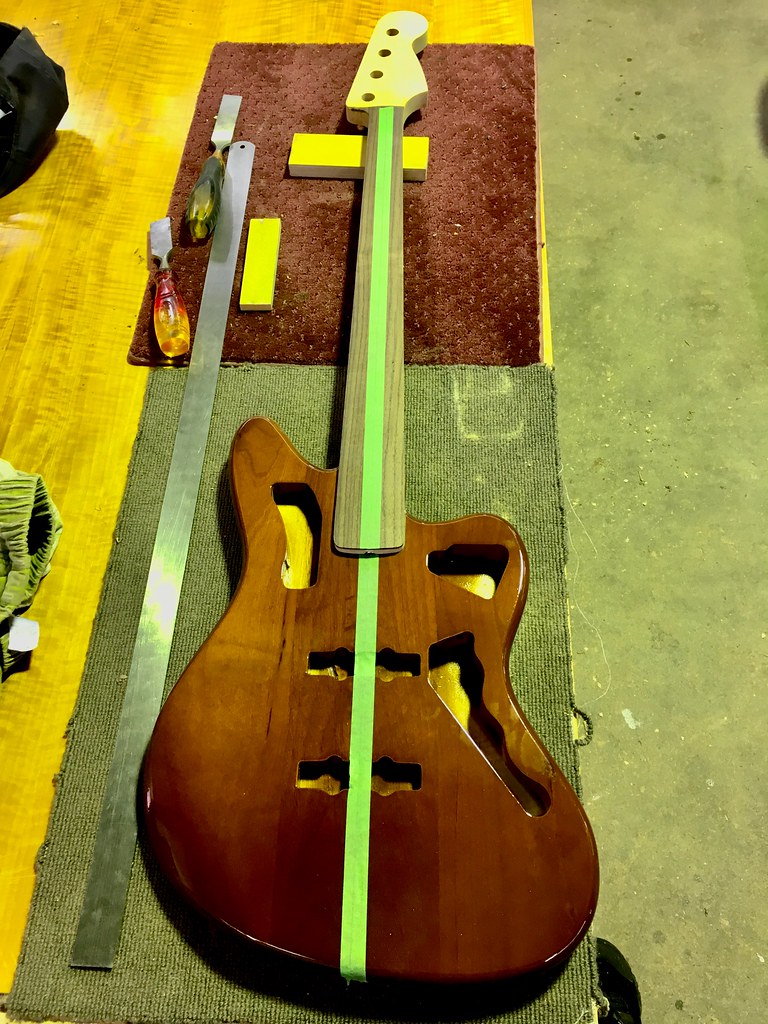
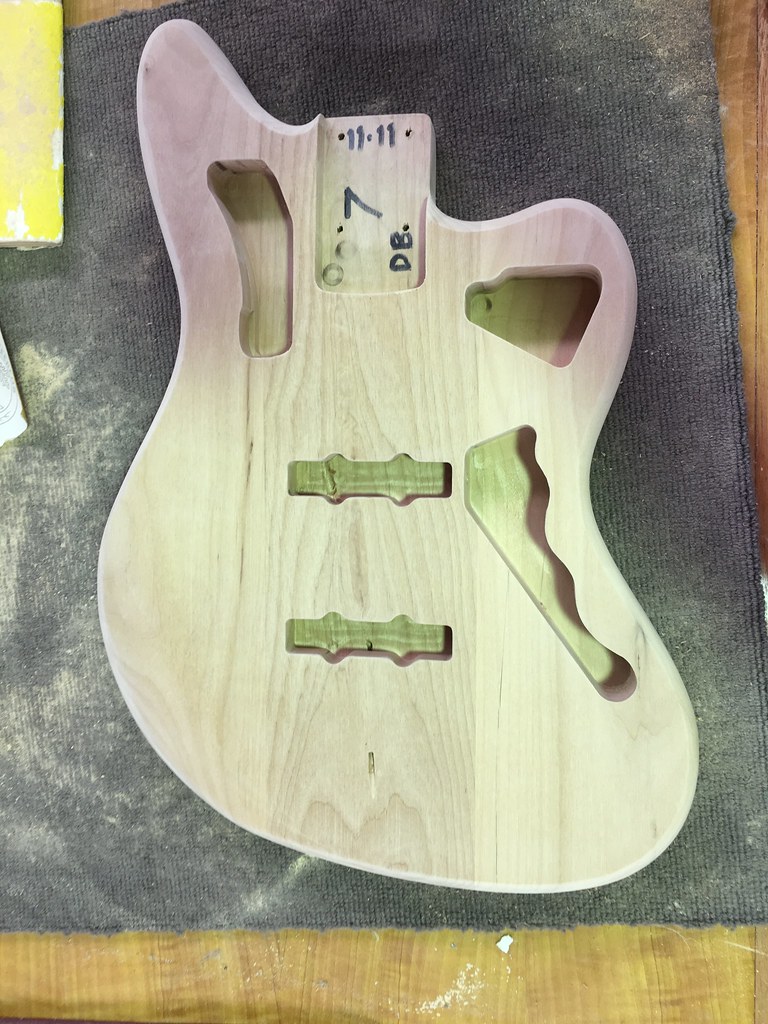
Here is the body just before drilling the wiring tunnels.I've left out the myriad of uninteresting construction shots...
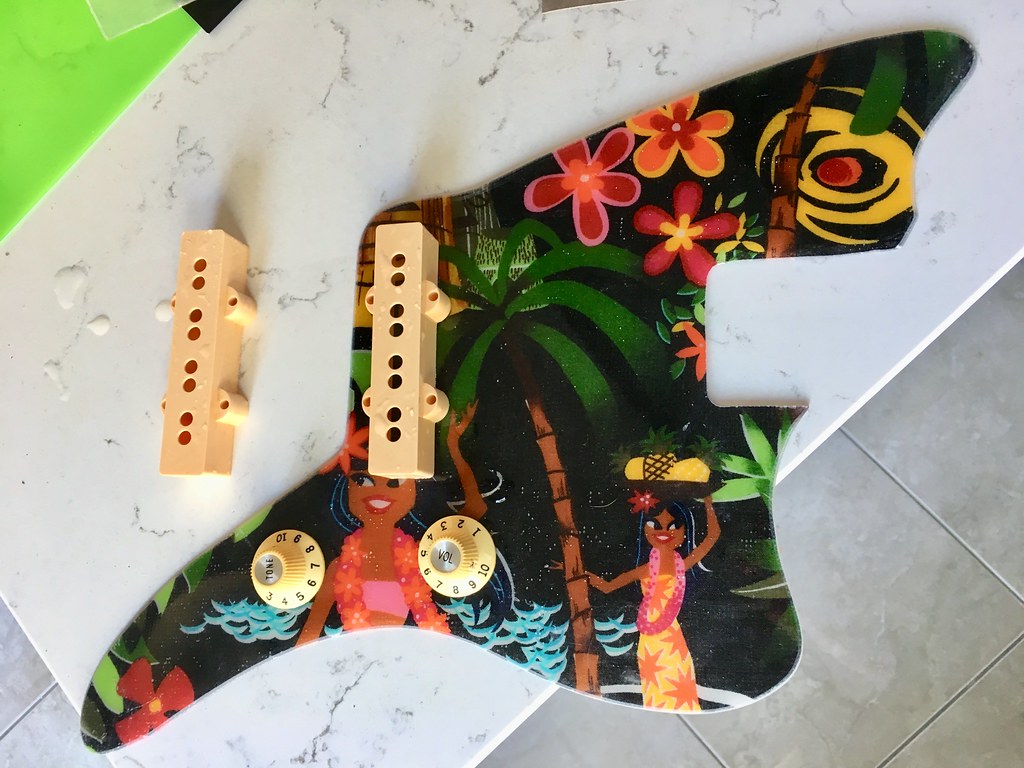
The top circuit tone/volume wheels will be deleted on this build, as they are unnecessary for the series/parallel concept, so tunnels are good - when removing the pickguard for service/maintenance I will just have to unscrew the top circuit selector switch and the bottom 3 way selector switch from the pickguard. The routing is also slightly modified to leave solid wood under the pickguard where one's fingers and knuckles rattle when playing slap grooves. Sounds funny when practising unplugged if you have a cavity in that spot. (Trying to think of everything this time)

Image
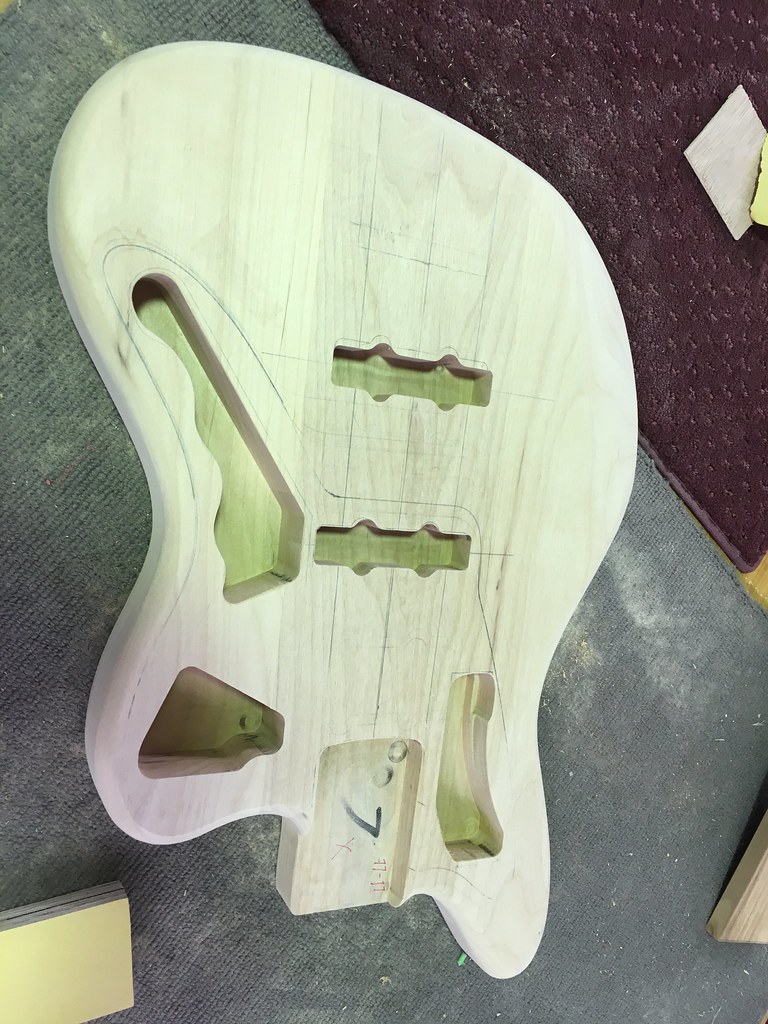
All tunnels drilled she's ready for sealer!

Image
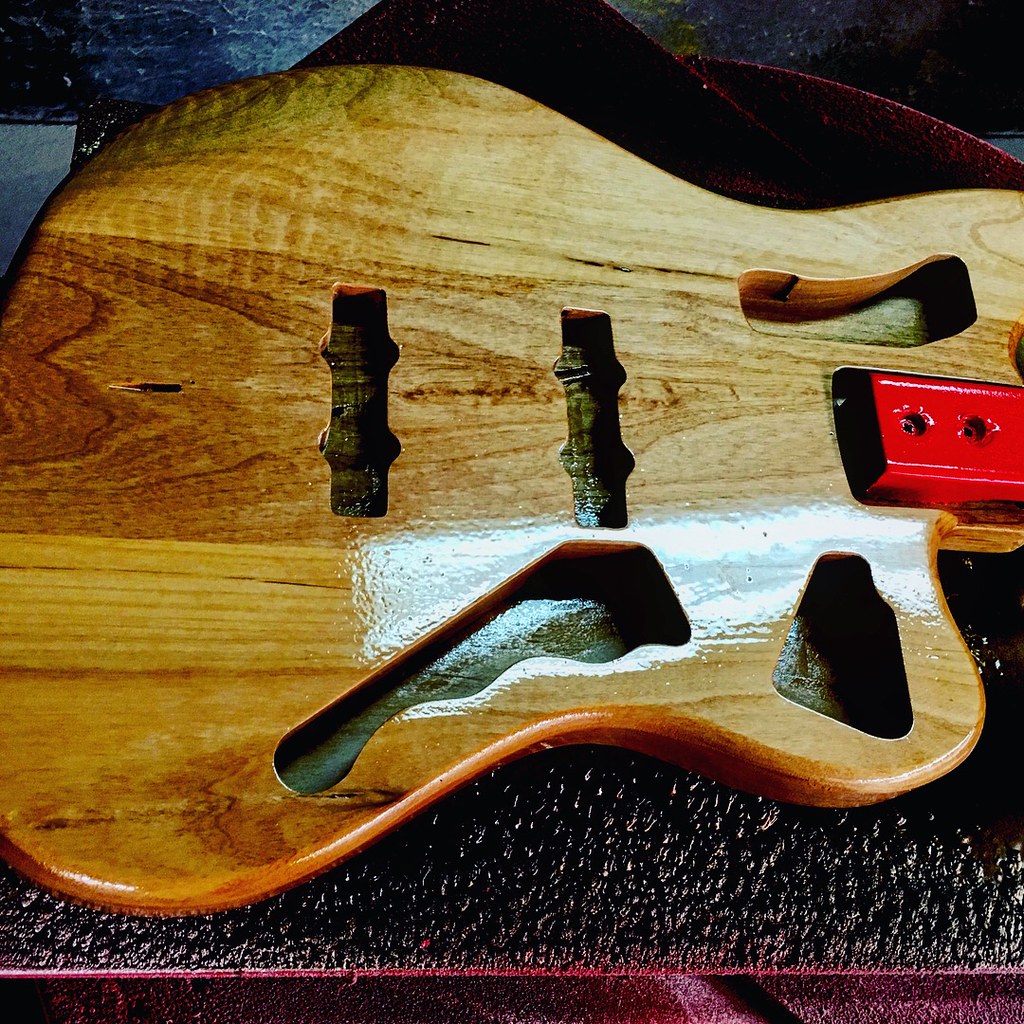
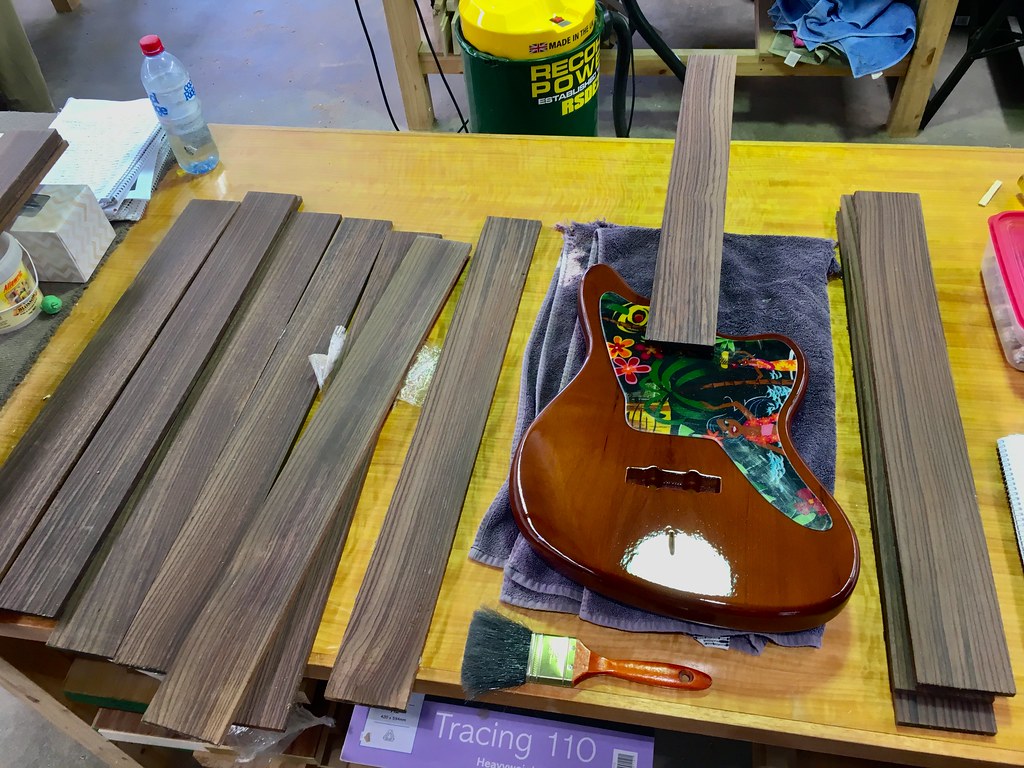
Some lovely wide grain in these three pieces of alder - which also mean it's relatively lightweight.

Image
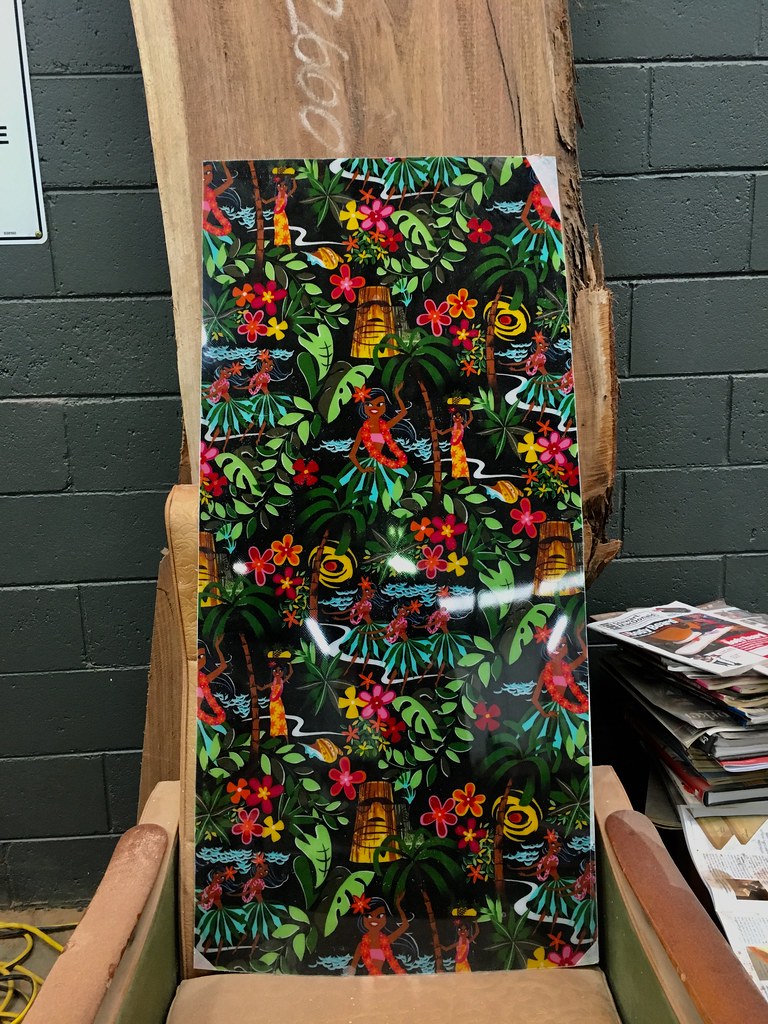
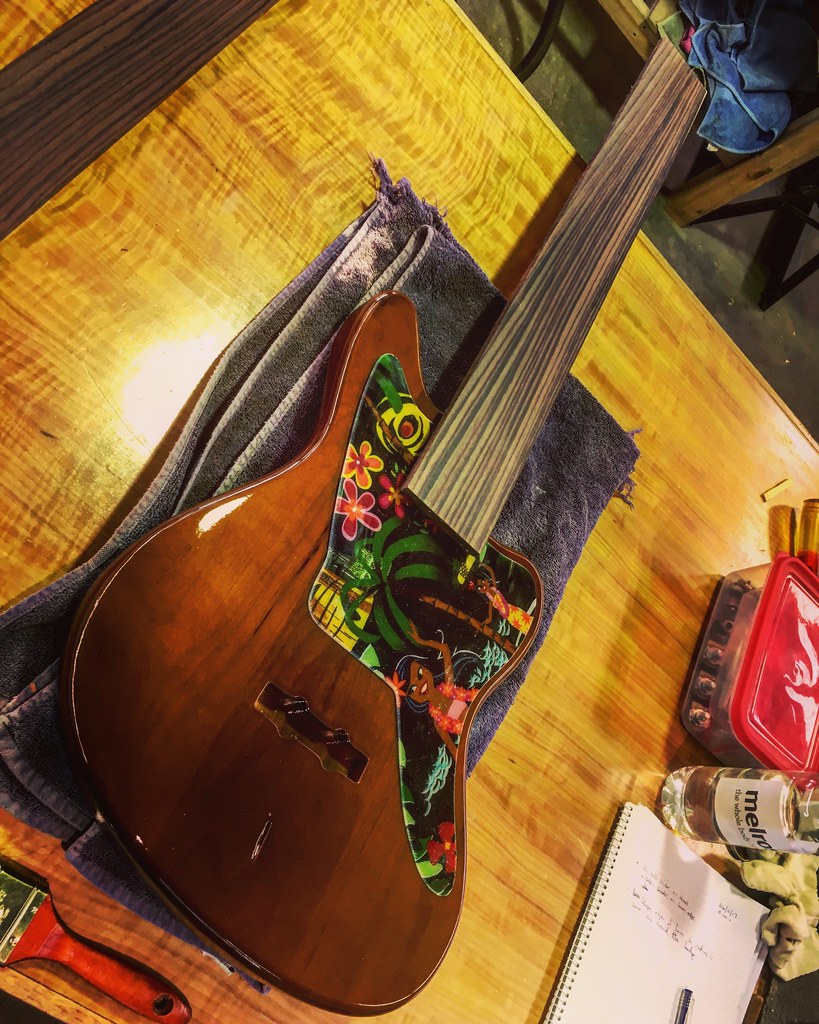
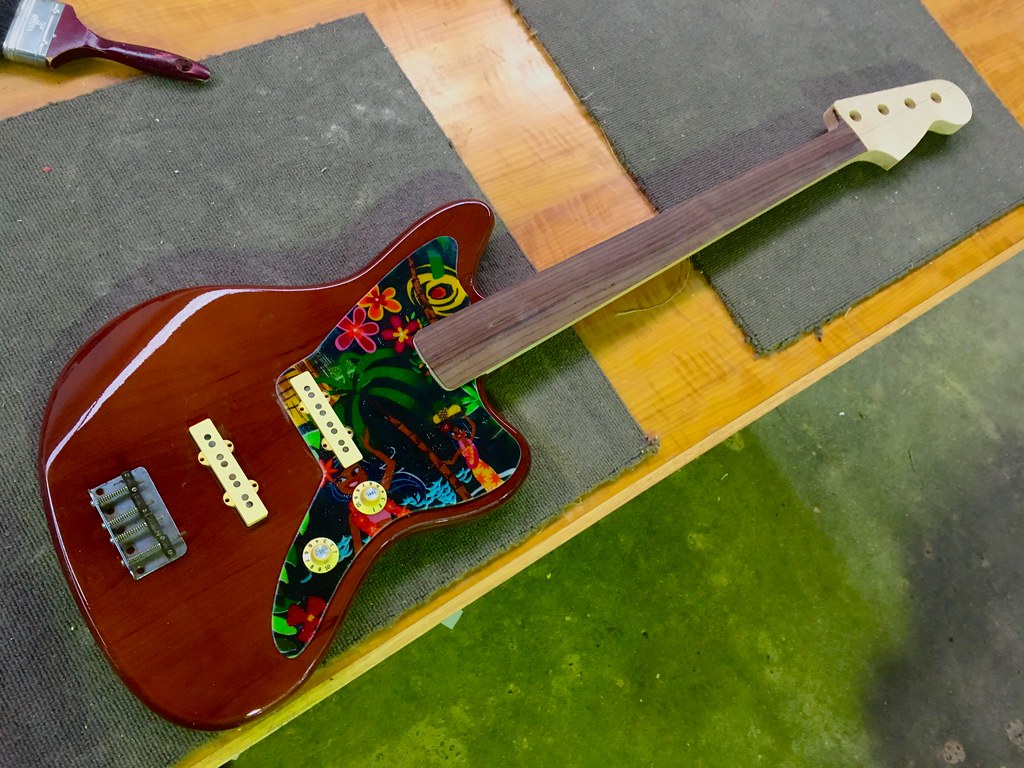
Here's the pickguard material. My local surfboard shaper laminated up this material which I had left over from when they built my most recent surfboard. The bass is going to mirror the look of the board. Similar color scheme to the first Tele Bass I built.

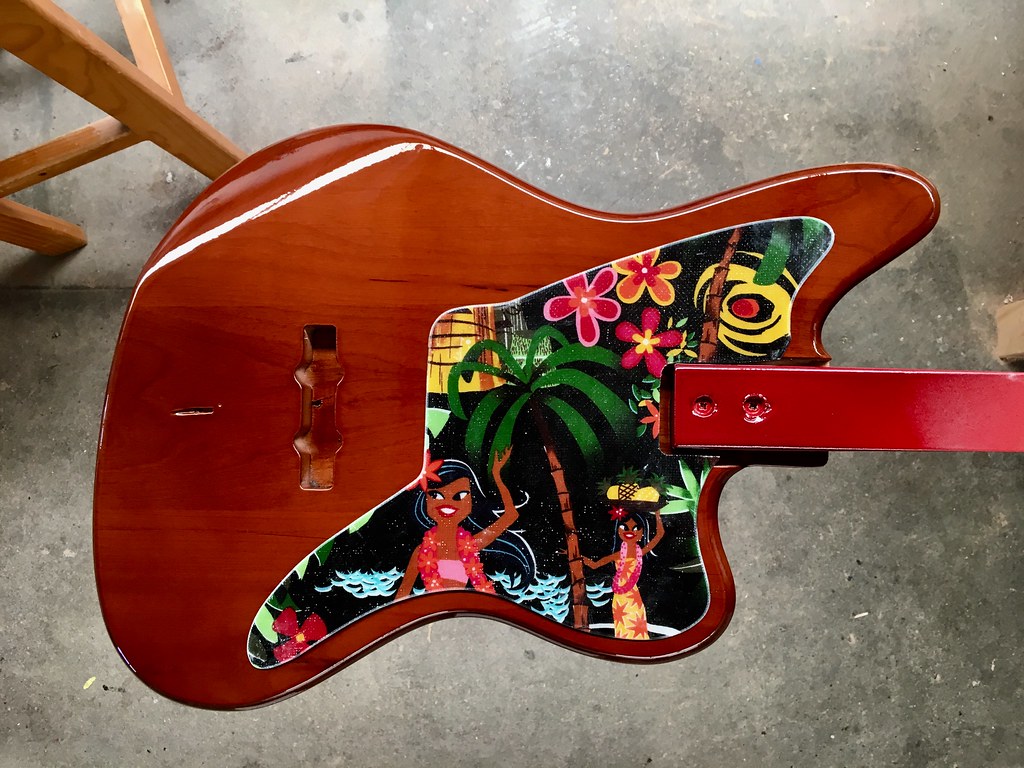
I got the tint coats on the body yesterday, and will finish it off next Tuesday with some clear.
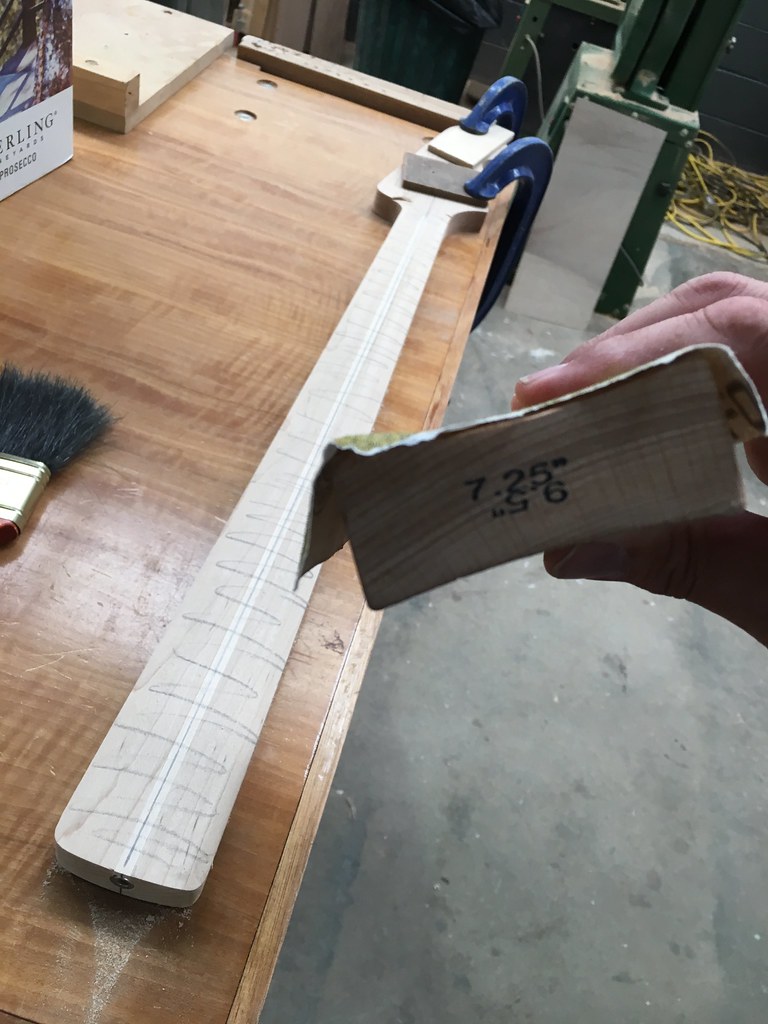
Next task will be dressing the neck blank and doing a nice skinny rosewood veneer for the fretboard.
I want to do dots and binding but at this stage we can't work out how to do this on a radiused fretboard neck. Fender of course did it on their Jazzmaster guitars and Jazz Basses, but they musta had a very cunning jig to pull this off...
Any input on this would of course be most welcome - otherwise the neck will be unbound with some nice pau shell dots in it.

Stay tuned - I am also restoring a 66 Jazz bass back to its original sunburst - always a messy proposition but always so rewarding when you get to do a burst! Another thread...

User avatar
Zork
PAT. # 2.972.923
PAT. # 2.972.923
Posts: 1811
Joined: Thu Jan 19, 2012 7:01 am
Location: Bremen, Germany

Re: Jazzmaster Bass IV Build #2

Post by Zork » Sat Nov 18, 2017 10:25 am

That pickguard is going to look awesome!

User avatar
HH1978
PAT. # 2.972.923
PAT. # 2.972.923
Posts: 676
Joined: Tue Aug 11, 2015 2:51 pm
Location: Brussels, Belgium

Re: Jazzmaster Bass IV Build #2

Post by HH1978 » Mon Nov 20, 2017 2:36 pm

Can't wait to see the result!

User avatar
boss302bass
PAT. # 2.972.923
PAT. # 2.972.923
Posts: 639
Joined: Mon Apr 13, 2009 5:25 am
Location: UK

Re: Jazzmaster Bass IV Build #2

Post by boss302bass » Wed Nov 22, 2017 9:09 pm

Got some more done the last couple of days.
Routed out the guard.
Color coats and clear is done (without meaning to I've managed to do a pretty good job of nailing the good old Fender walnut finish)
Pickguard sits well with it methinks.
Plastic knobs took a coffee dive to get closer to the pickup covers - not perfect so I've ordered a set of white covers to see if I can use the coffee to match the knobs better.
Sized up the maple for the neck this morning. have that to cut out on Saturday.

Image

Image

Image

User avatar
Shadoweclipse13
PAT. # 2.972.923
PAT. # 2.972.923
Posts: 12446
Joined: Fri Feb 07, 2014 9:22 pm
Location: Stuck in the dimension of imagination

Re: Jazzmaster Bass IV Build #2

Post by Shadoweclipse13 » Thu Nov 23, 2017 12:23 am

So hot!! I love when people use different materials for pickguards and plates!

Also, that blue Tele bass up near the top is incredible!!! Rosewood neck? The whole thing looks like an old WWII fighter plane and I love it!!
Pickup Switching Mad Scientist
http://www.offsetguitars.com/forums/viewtopic.php?f=8&t=104282&p=1438384#p1438384

User avatar
boss302bass
PAT. # 2.972.923
PAT. # 2.972.923
Posts: 639
Joined: Mon Apr 13, 2009 5:25 am
Location: UK

Re: Jazzmaster Bass IV Build #2

Post by boss302bass » Thu Nov 23, 2017 1:56 am

Shadoweclipse13 wrote:
Thu Nov 23, 2017 12:23 am
So hot!! I love when people use different materials for pickguards and plates!

Also, that blue Tele bass up near the top is incredible!!! Rosewood neck? The whole thing looks like an old WWII fighter plane and I love it!!
Thanks man, I was pretty happy with the way the Spitfire Bass turned out. It was inspired by the blue painted photo-reconnaissance Spitfires that flew high altitude unarmed throughout the war. It has a Morado fretboard radiused onto a rosewood neck. It has an old 1968 Tele bass pickup in it. The body is made from Golden Cypress timber from windbreak trees near where I live. The trees were 150 years old and I let the boards season for 7 years before turning them into bass bodies. It sounds real nice and you can still smell the Golden Cypress through the nitro paint.

User avatar
boss302bass
PAT. # 2.972.923
PAT. # 2.972.923
Posts: 639
Joined: Mon Apr 13, 2009 5:25 am
Location: UK

Re: Jazzmaster Bass IV Build #2

Post by boss302bass » Fri Nov 24, 2017 9:17 pm

With the truss rod in and the neck edges squared, it's time to sand down to the desired radius...7.25"
Image

And choose a fretboard from the pile.
Image

This one looks sick! Then I split it clamping it up to the neck...
Back to the pile...
Image

User avatar
sirspens
PAT. # 2.972.923
PAT. # 2.972.923
Posts: 786
Joined: Sun Nov 08, 2015 8:26 pm
Location: Austin, Texas
Contact:

Re: Jazzmaster Bass IV Build #2

Post by sirspens » Sat Nov 25, 2017 9:31 pm

You radiused the neck, not the fretboard?

User avatar
mcjt
PAT. # 2.972.923
PAT. # 2.972.923
Posts: 4295
Joined: Fri Dec 29, 2006 2:17 pm
Location: Côte-St-Luc QC

Re: Jazzmaster Bass IV Build #2

Post by mcjt » Mon Nov 27, 2017 6:00 pm

He will do both......
sirspens wrote:
Sat Nov 25, 2017 9:31 pm
You radiused the neck, not the fretboard?

User avatar
elektrovac
PAT. # 2.972.923
PAT. # 2.972.923
Posts: 1007
Joined: Sun Apr 15, 2007 12:22 pm
Location: Floating in space

Re: Jazzmaster Bass IV Build #2

Post by elektrovac » Tue Nov 28, 2017 12:14 am

Looks great!

Regarding the pickguard issue, years ago I made this 'Jazzblaster Bass' and just made the larger pickups exceed the boundaries of the pickguard. The outline is still the same, but kinda ousted byt the large pickup, if you get me ... Looks natural enough, I think:

Image
Last edited by elektrovac on Tue Nov 28, 2017 4:17 am, edited 1 time in total.

User avatar
boss302bass
PAT. # 2.972.923
PAT. # 2.972.923
Posts: 639
Joined: Mon Apr 13, 2009 5:25 am
Location: UK

Re: Jazzmaster Bass IV Build #2

Post by boss302bass » Tue Nov 28, 2017 4:11 am

elektrovac wrote:
Tue Nov 28, 2017 12:14 am
Looks great!

Regarding the pickgurd issue, years ago I made this 'Jazzblaster Bass' and just made the larger pickups exceed the boundaries of the pickguard. The outline is still the same, but kinda ousted byt the large pickup, if you get me ... Looks natural enough, I think:

Dude that's outrageous...great job. TWO of those monstrous sounding Tele bass pickups in the one bass? I'm impressed. And it looks cool too!

User avatar
boss302bass
PAT. # 2.972.923
PAT. # 2.972.923
Posts: 639
Joined: Mon Apr 13, 2009 5:25 am
Location: UK

Re: Jazzmaster Bass IV Build #2

Post by boss302bass » Tue Nov 28, 2017 4:17 am

sirspens wrote:
Sat Nov 25, 2017 9:31 pm
You radiused the neck, not the fretboard?
The fretboard is actually milled down to 2.5mm. This is the fourth maple/rosewood veneer neck I've done, and the second time a board has split when trying to glue and clamp it to the radiused maple neck. So a 50% success rate is not good enough.
How the hell does Fender do it to so many of their rosewood veneer necks? What's their secret? I'll probably never know, but we solved the problem in the workshop today - HOT WATER.
Soak the veneer fretboard in hot water for about 5 minutes, pull it out, dry off the side that will be glued to the neck (doesn't have to be bone dry) then slap down a coat of Titebond on the maple neck, add clamping caul and clamps, and the veneer is so flexible and warm it bends to the radius of the neck no problemo!

User avatar
elektrovac
PAT. # 2.972.923
PAT. # 2.972.923
Posts: 1007
Joined: Sun Apr 15, 2007 12:22 pm
Location: Floating in space

Re: Jazzmaster Bass IV Build #2

Post by elektrovac » Tue Nov 28, 2017 4:23 am

boss302bass wrote:
Tue Nov 28, 2017 4:11 am
Dude that's outrageous...great job. TWO of those monstrous sounding Tele bass pickups in the one bass? I'm impressed. And it looks cool too!
Thanks - The pickups were reworked by Curtis Novak. The neck pickup is made to vintage specifications which means it has a bar magnet (yes, these were not made with CuNiFe rods like the guitar counterpart) and it has that massive 1970s Telecaster Bass sound.
The bridge pickup is made with rod magnets and intended to sound more like a Sting Ray Bass pickup. It also sits in the Sting Ray PU position.
It's a great sounding bass. Very versatile.

User avatar
boss302bass
PAT. # 2.972.923
PAT. # 2.972.923
Posts: 639
Joined: Mon Apr 13, 2009 5:25 am
Location: UK

Re: Jazzmaster Bass IV Build #2

Post by boss302bass » Tue Nov 28, 2017 4:27 am

Thanks - The pickups were reworked by Curtis Novak. The neck pickup is made to vintage specifications which means it has a bar magnet (yes, these were not made with CuNiFe rods like the guitar counterpart) and it has that massive 1970s Telecaster Bass sound.
The bridge pickup is made with rod magnets and intended to sound more like a Sting Ray Bass pickup. It also sits in the Sting Ray PU position.
It's a great sounding bass. Very versatile.
[/quote]

Awesome. Always rad when a build fulfills your expectations and hopes!

User avatar
boss302bass
PAT. # 2.972.923
PAT. # 2.972.923
Posts: 639
Joined: Mon Apr 13, 2009 5:25 am
Location: UK

Re: Jazzmaster Bass IV Build #2

Post by boss302bass » Fri Dec 01, 2017 1:09 am

More progress.
The veneer board worked like a charm - after the secret to success was deemed to be a soaking in hot water before clamping and gluing.
Got the neck pocket and pickup rout done on the guard, the tuner holes bored. Next session, fret slots, and headstock transition.

Image
Fretboard perfect glue up...

Image
Getting neck alignment right...


Image
Neck pocket is now aligned, with guard routed to fit neck pocket.

Post Reply