Jazzmaster build! Sherwood Green + Spitfire Tort
- Rockinrob86
- PAT PEND
- Posts: 24
- Joined: Tue Sep 11, 2012 7:56 am
Jazzmaster build! Sherwood Green + Spitfire Tort
I've had a J Mascis Squier Jazzmaster since they came out, and really like it. But I do prefer smaller frets, and have always wanted a matching headstock, so I've decided to sell the mascis and build my dream Jmaster!
Over the last year I've been collecting parts, starting with a Guitar Mill body I picked up at tgp, an Allparts neck I got for my birthday, an AVRI trem, and Duncan Antiquity I pickups that I bought for my Mascis (wanted more traditional tones rather than the more p90ish mascis sounds, which are great in their own respects).
I decided it would be cool to practice spraying a burst finish on the body, so I started with that. I forgot to take a picture with all the raw wood, but here we go:
I didn't take a picture of the black band, and after this came the primer, so on to the neck (I had a little help)
Who can guess what color she'll be???
Last edited by Rockinrob86 on Sat Apr 08, 2017 2:37 pm, edited 2 times in total.
- Rockinrob86
- PAT PEND
- Posts: 24
- Joined: Tue Sep 11, 2012 7:56 am
Re: Jazzmaster build!
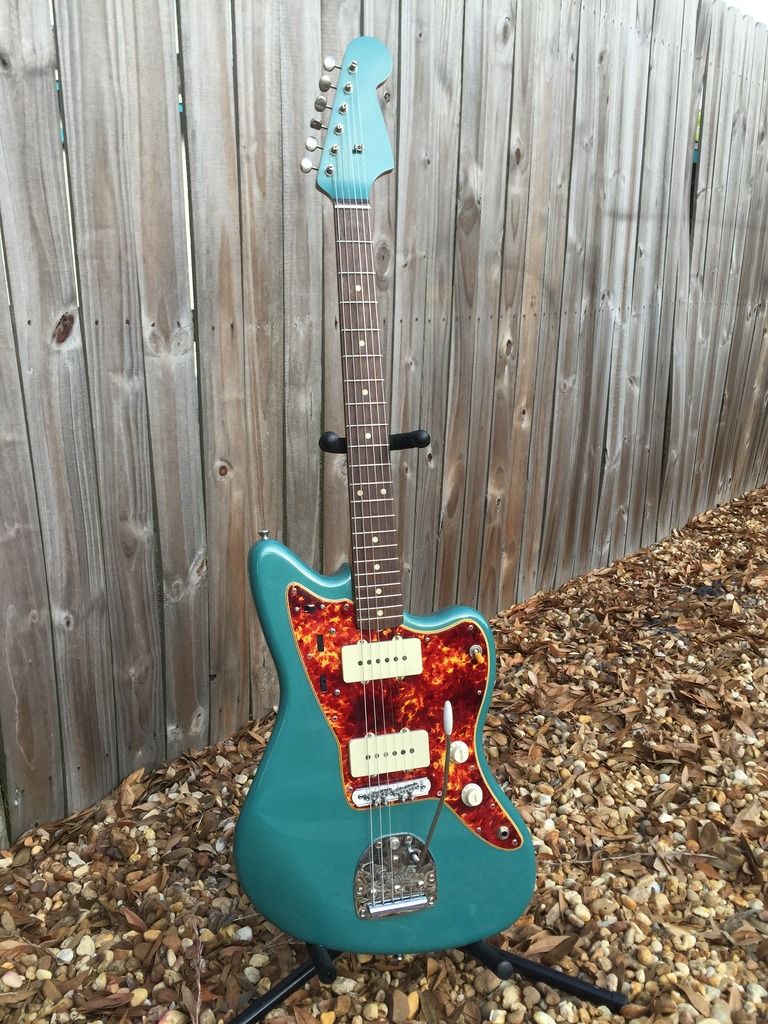
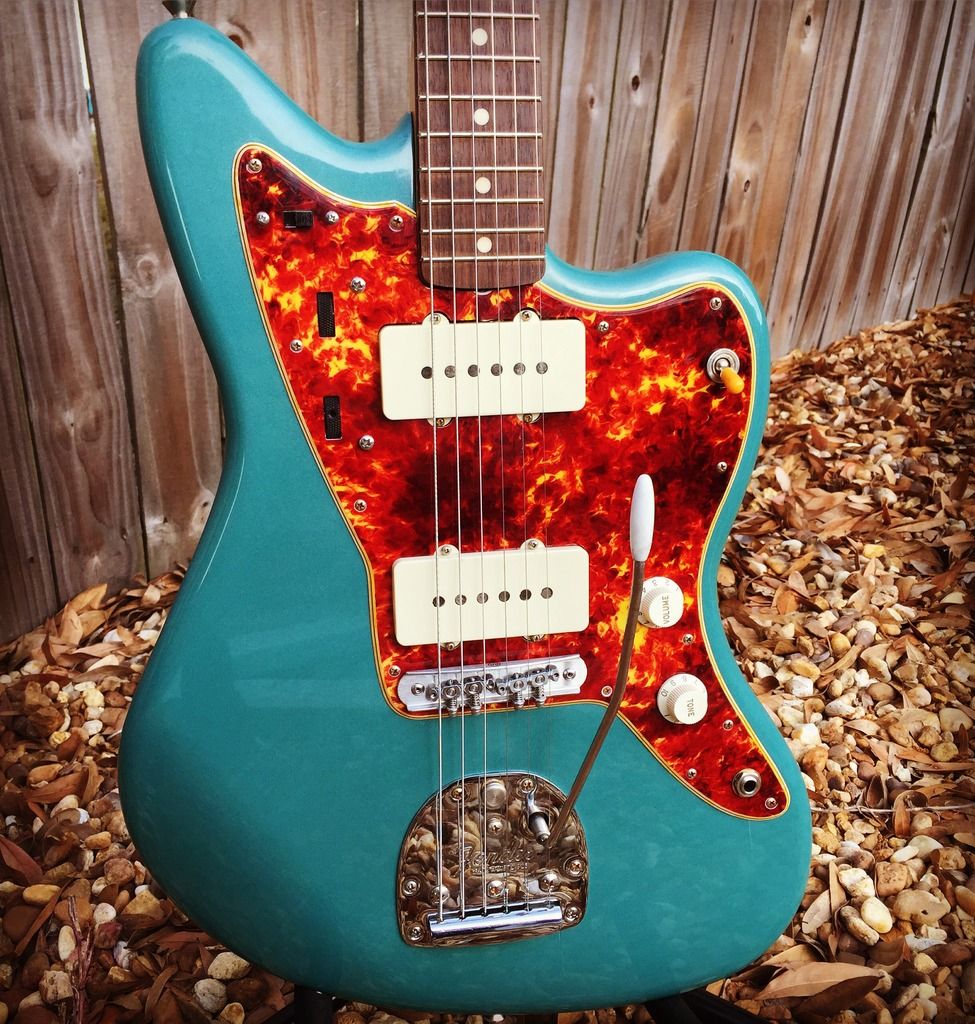
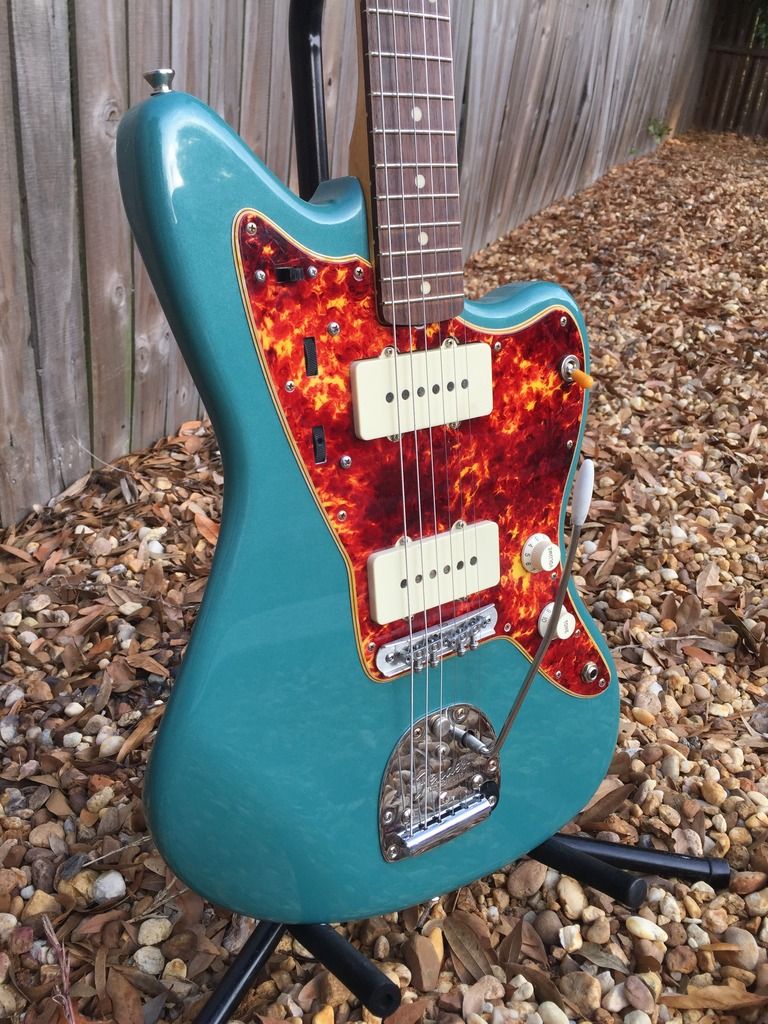
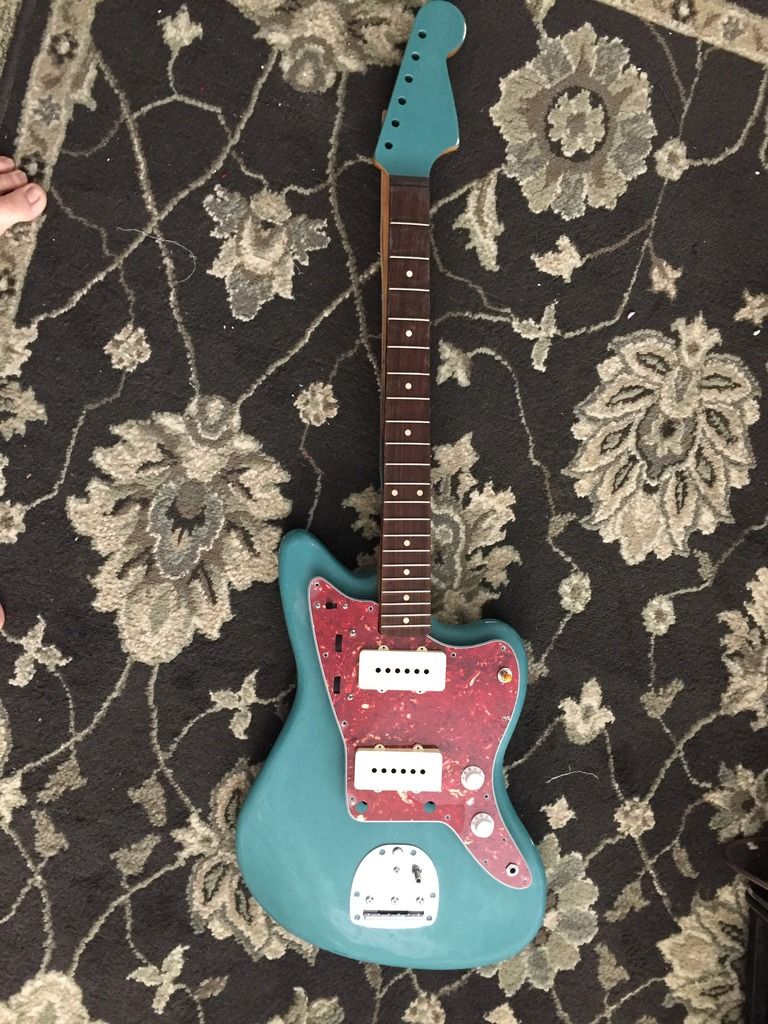
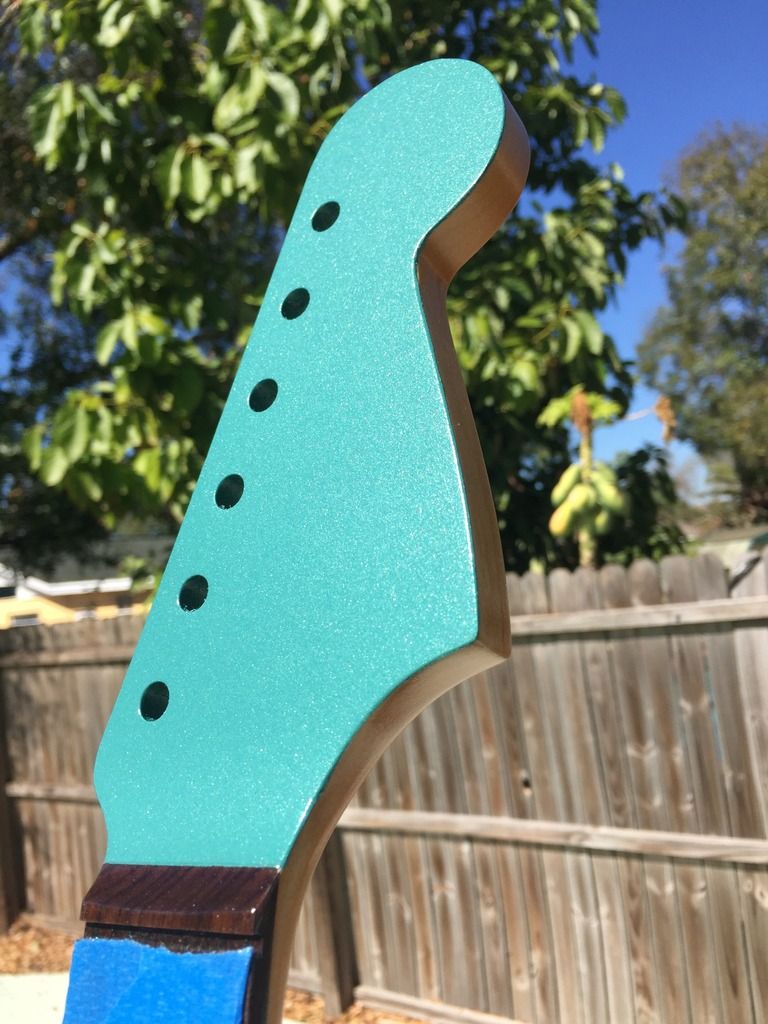
Sherwood Green it is!
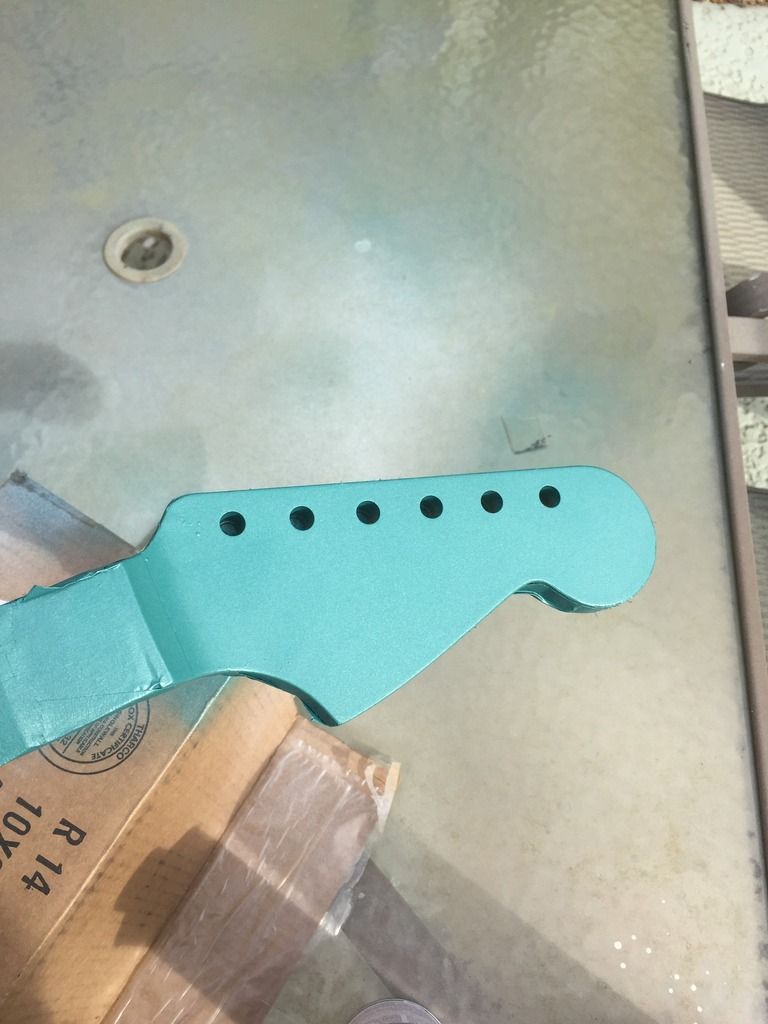
Unfortunately, I made a few mistakes on this go. First, I didn't have the primer leveled very well. On the black rings of the sunburst, it was a bit humid out, and I got some small bubbles in the finish. I scraped the bubbles out with a microscope slide, and sanded it a bit, but didn't get it truly flat - this was a mistake. I was thinking the primer would level it out, but it clearly didn't. I was also not careful enough with the finish before clearcoating - the metal flakes in the finish are very easily disturbed, and you have to be super careful both when spraying it (start and end the spray away from the body) and handling the body after finishing (don't!).
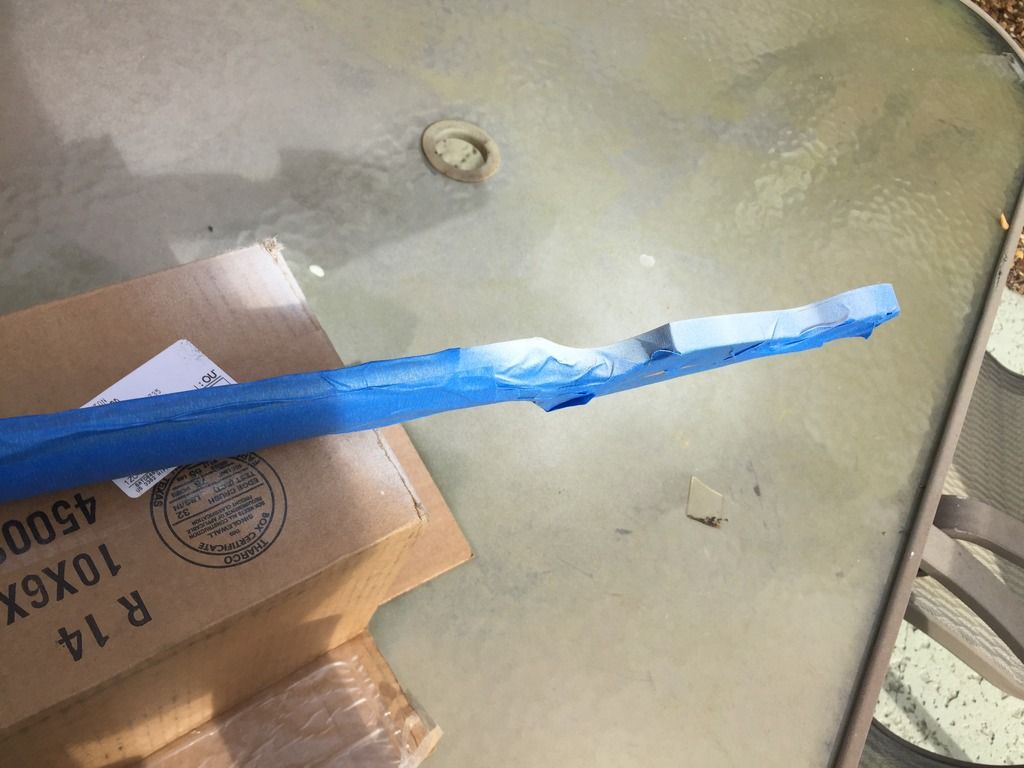
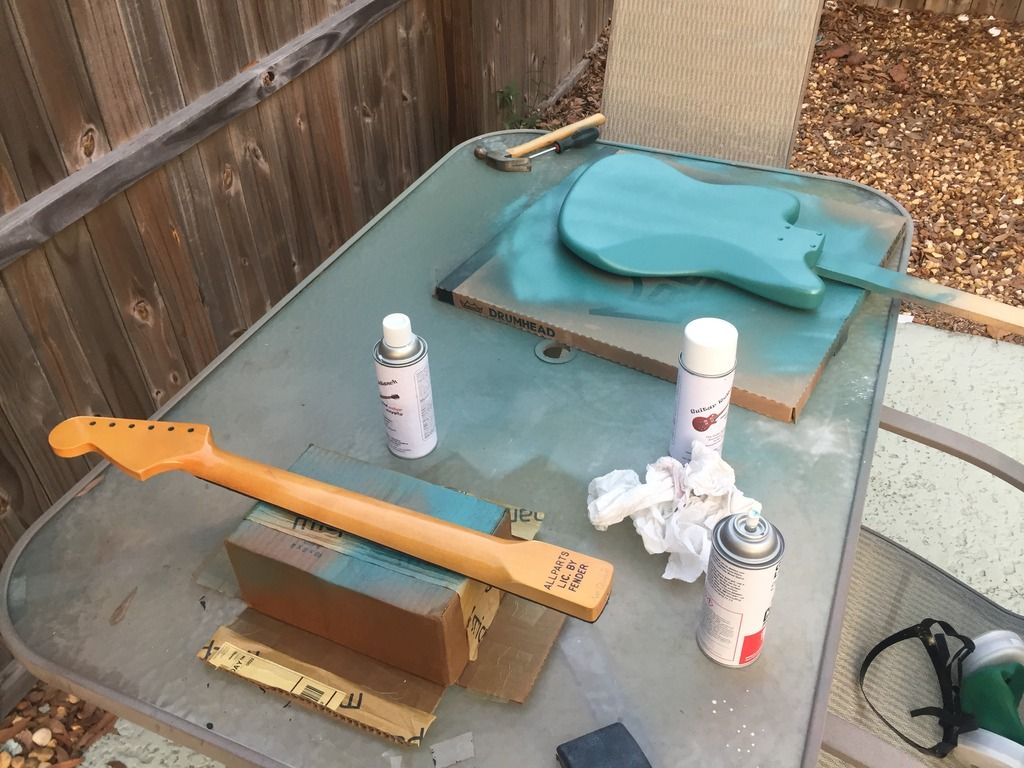
So I sanded down until it was pretty level, reprimed it and resprayed. This time I improvised a better solution than spraying towards the ground or ruining a patio table. I also had to order another can of paint.
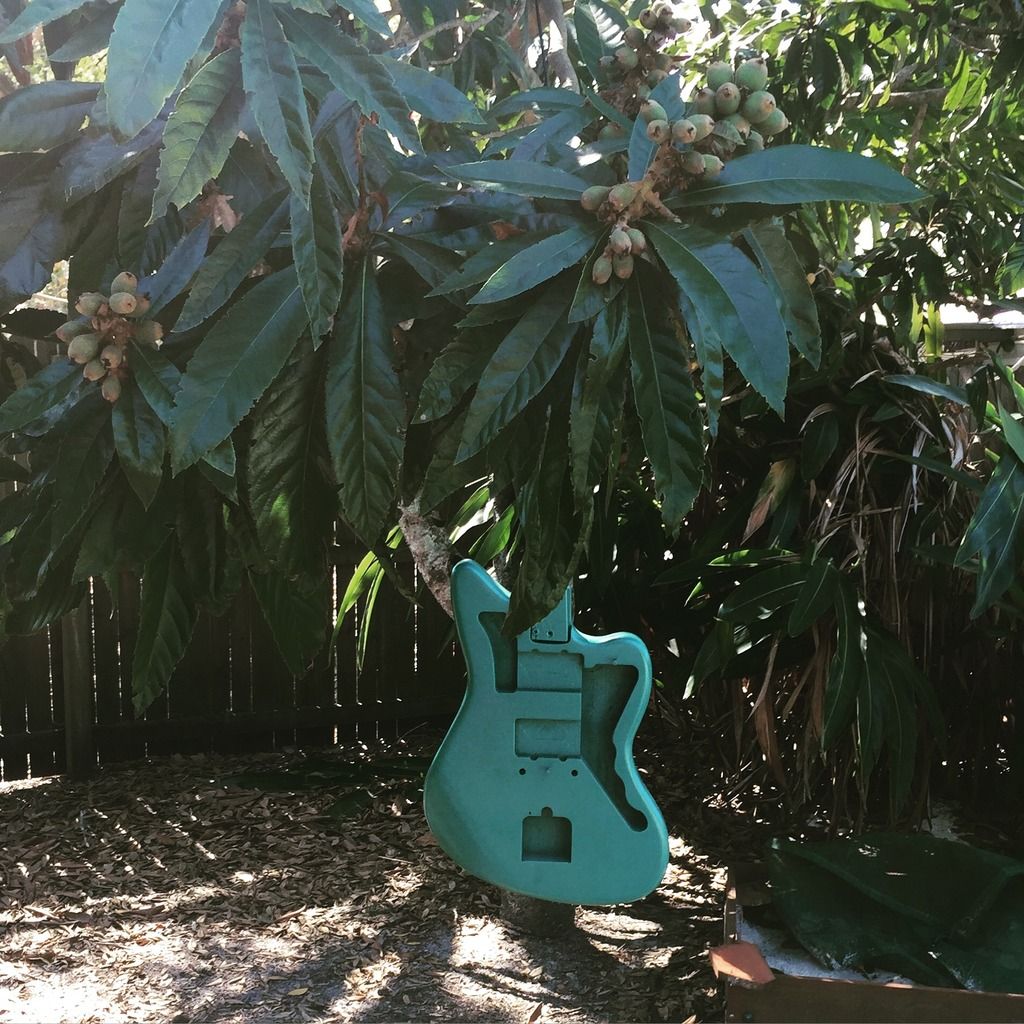
At my house, guitars grow on my guitar tree, which also sprouts loquats!
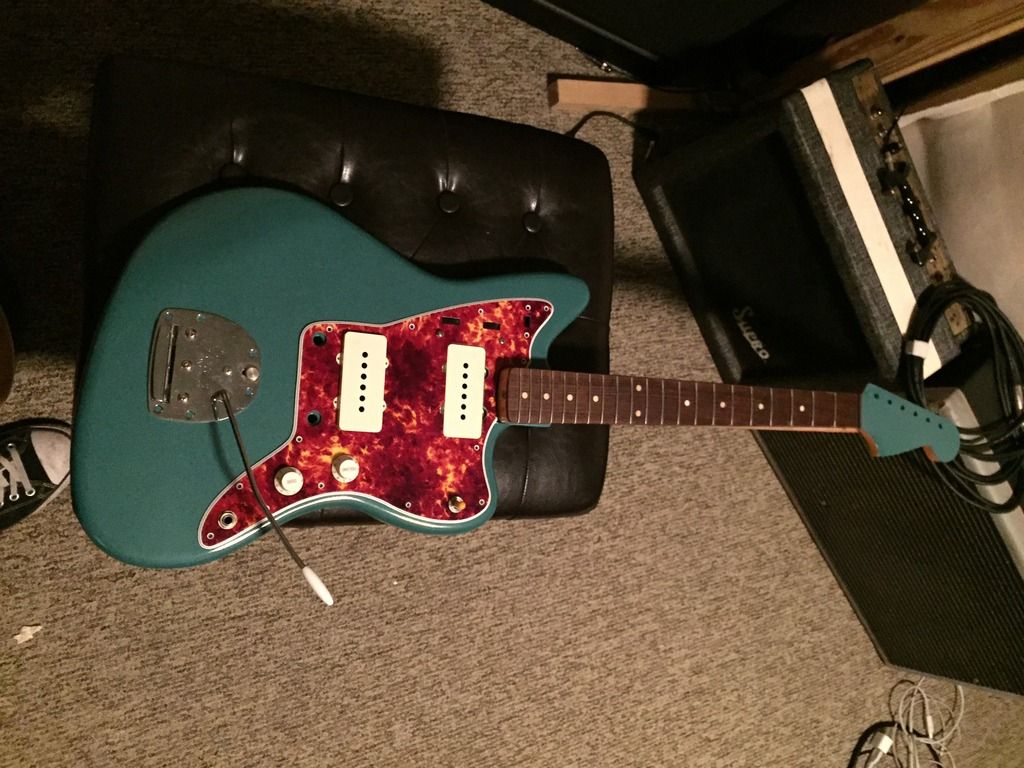
Unfortunately, this was not to be the final time I finished this guitar! I made the mistake of not spraying enough clear coats.
Here's the thing - a can of clear LOOKS like it is a finished guitar. Sure there are little bumps you can feel, but it seems like you can easily sand those out. It's not true. You have to go until it feels completely smooth - my final paint job ended up with 4 cans of clear on it - I still haven't sanded this one out yet, and if I sand through this time I may just smash this guitar through my TV or something!
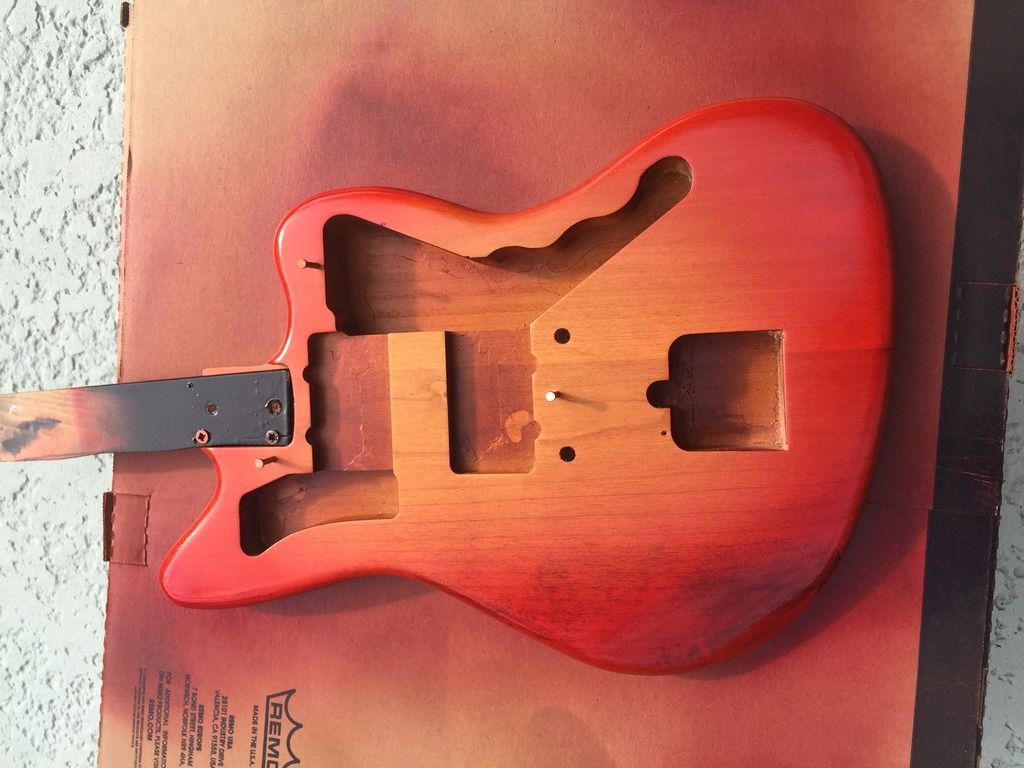
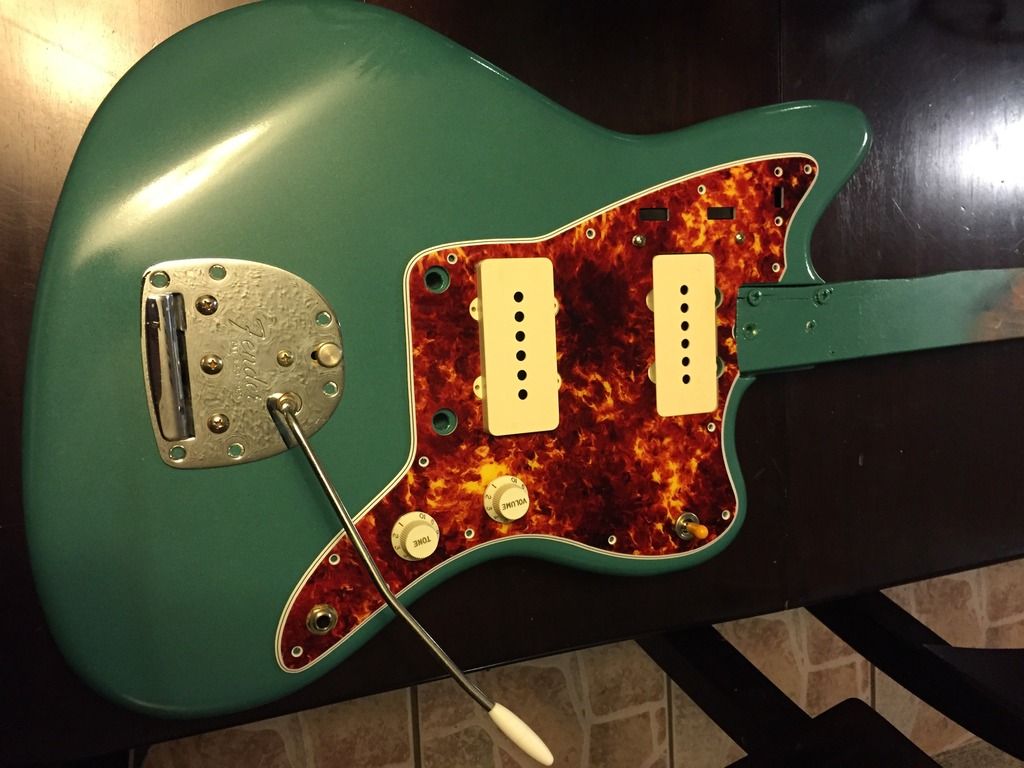
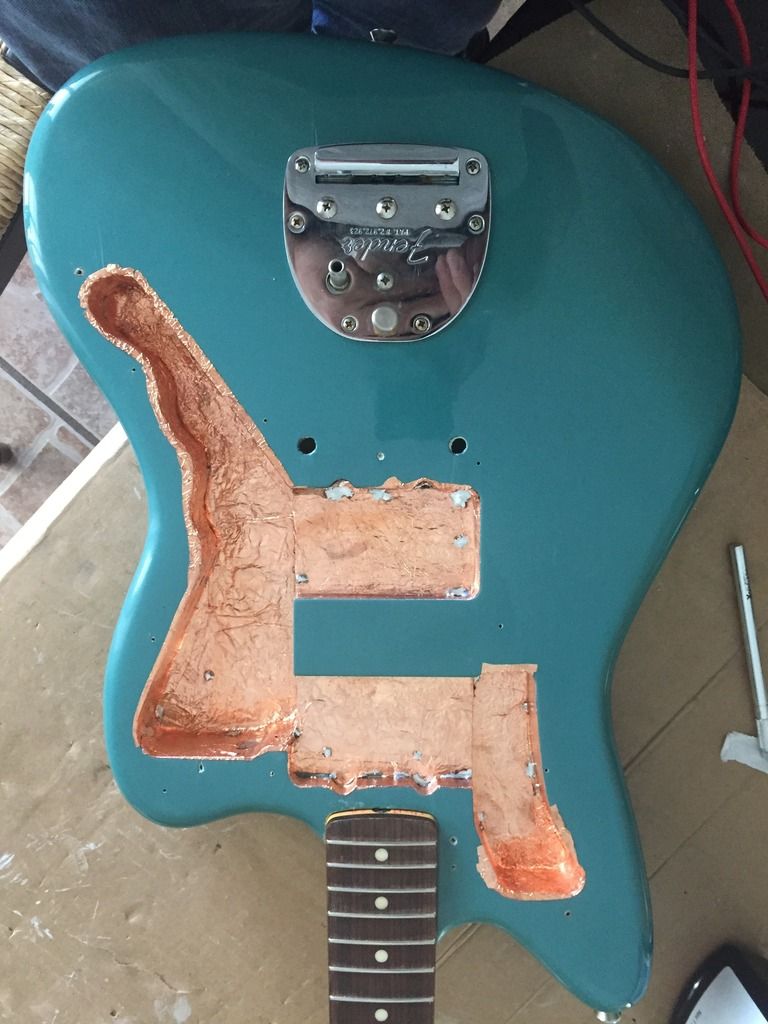
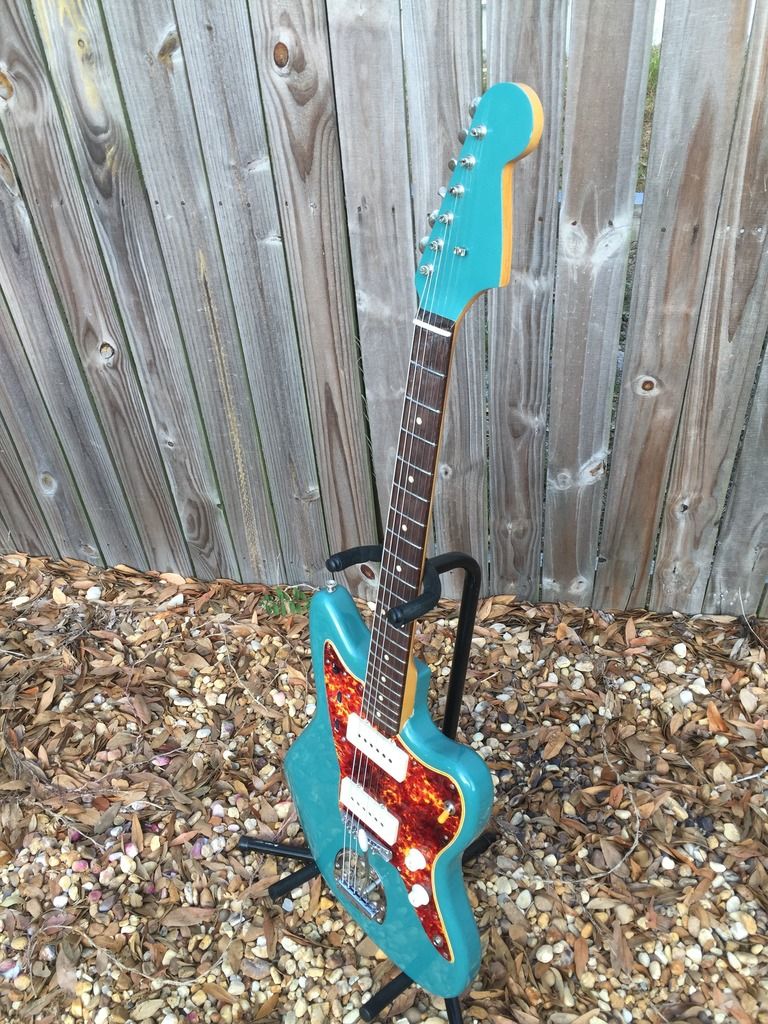
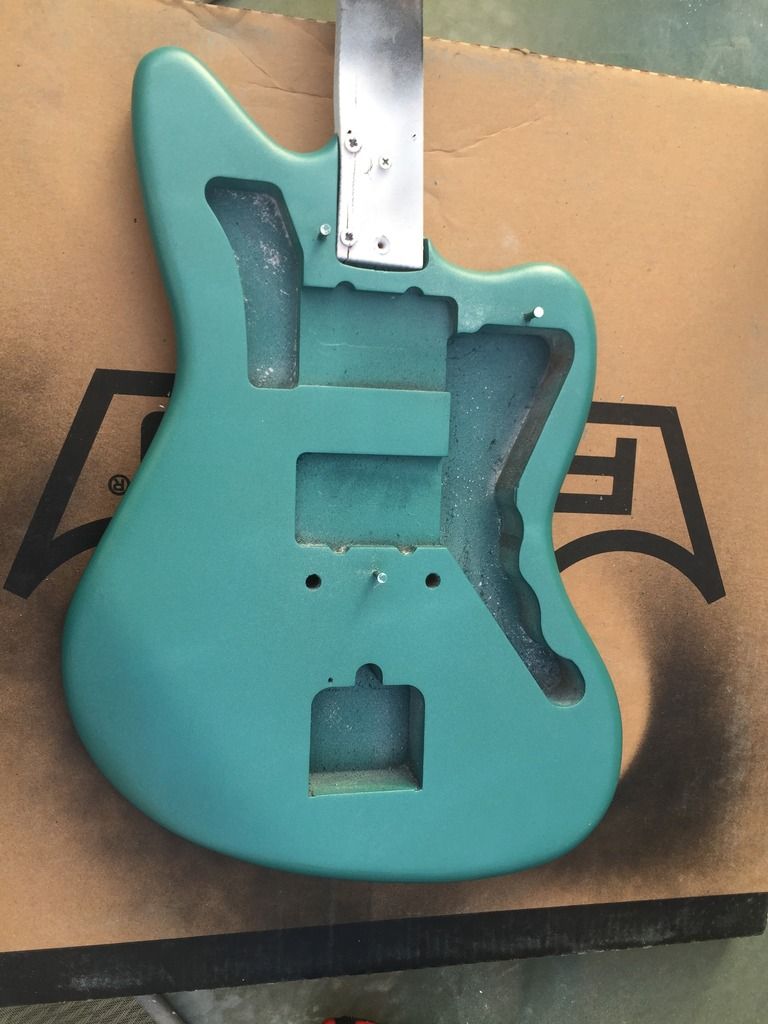
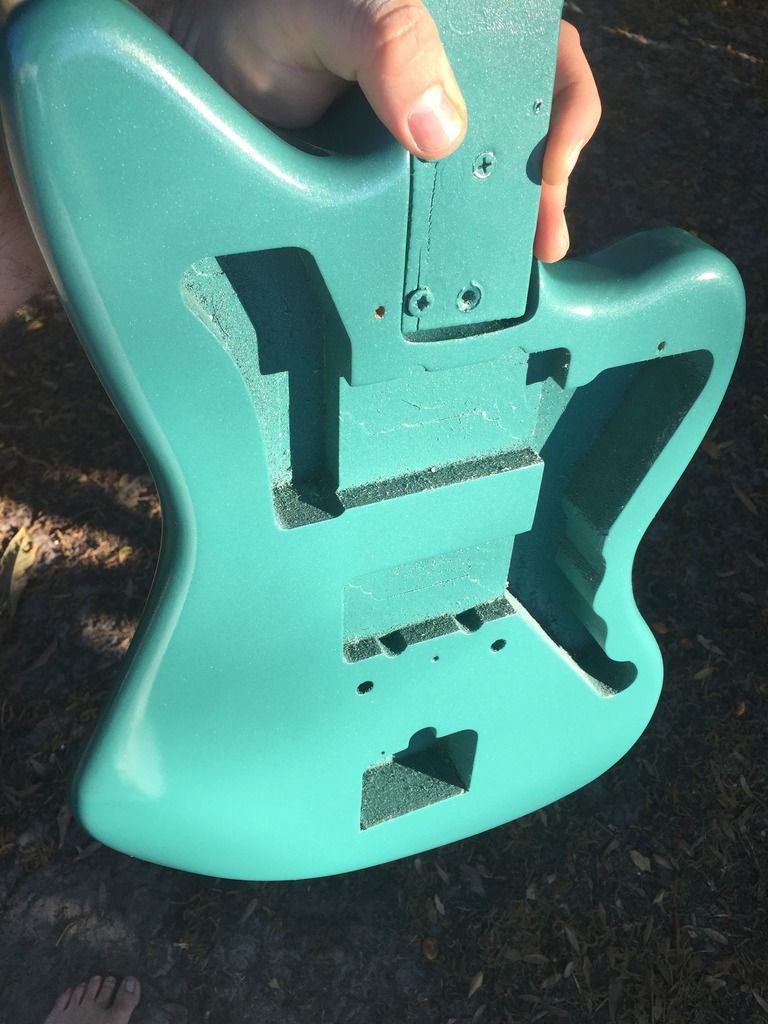
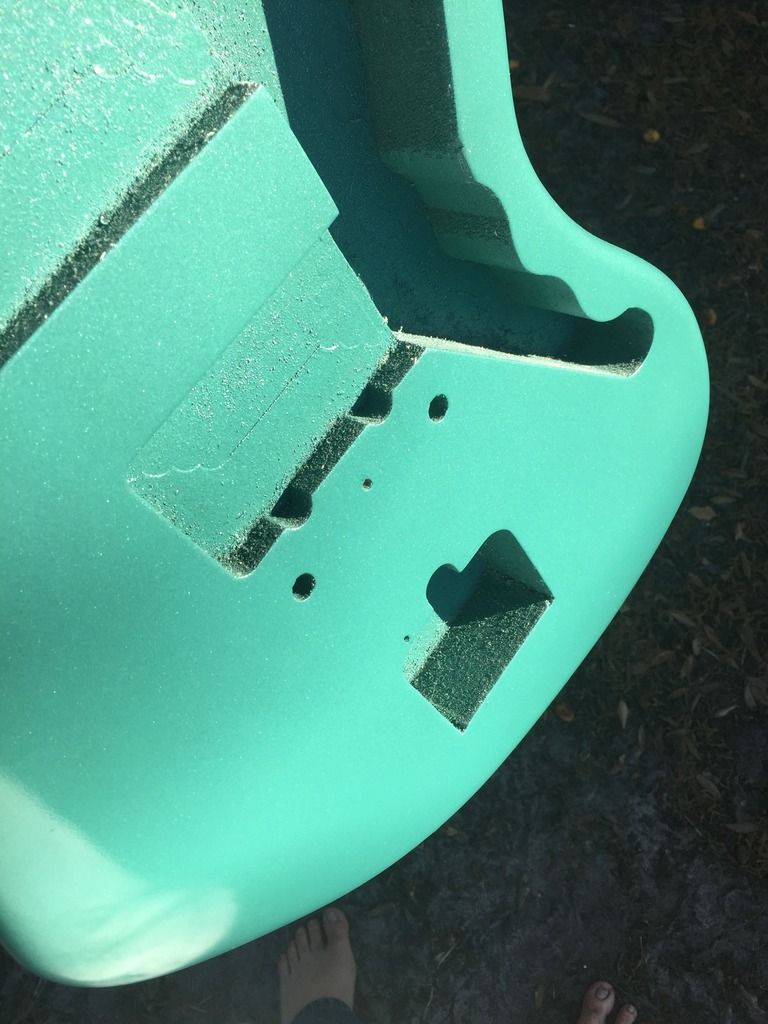
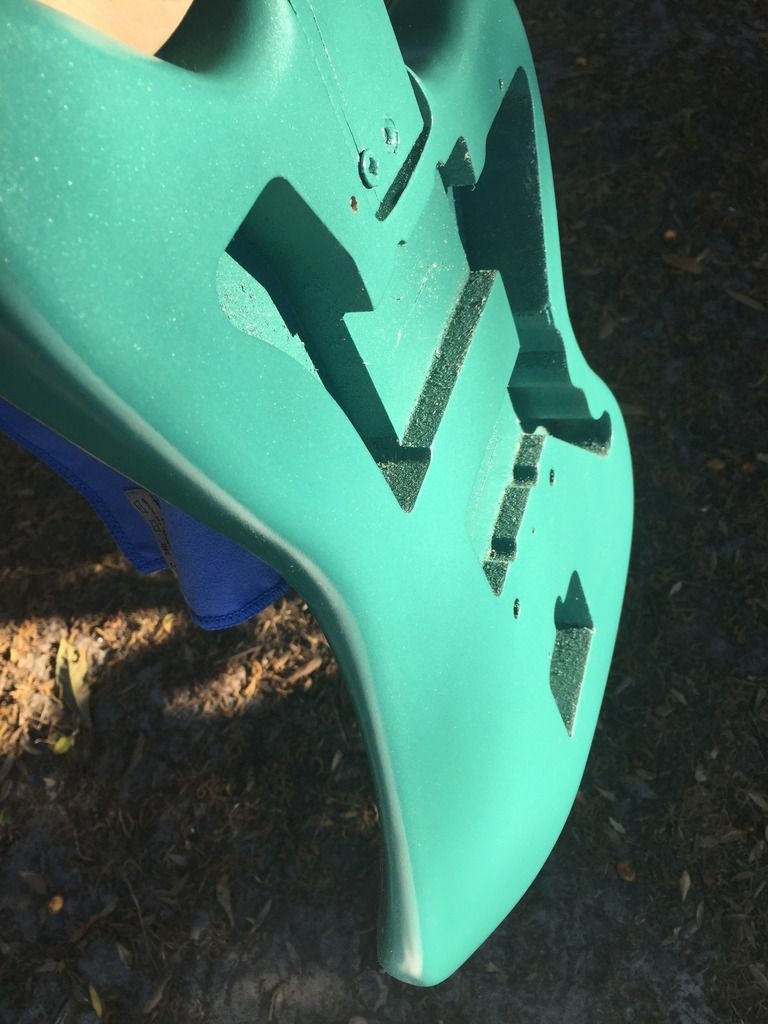
Here it is with sand throughs:
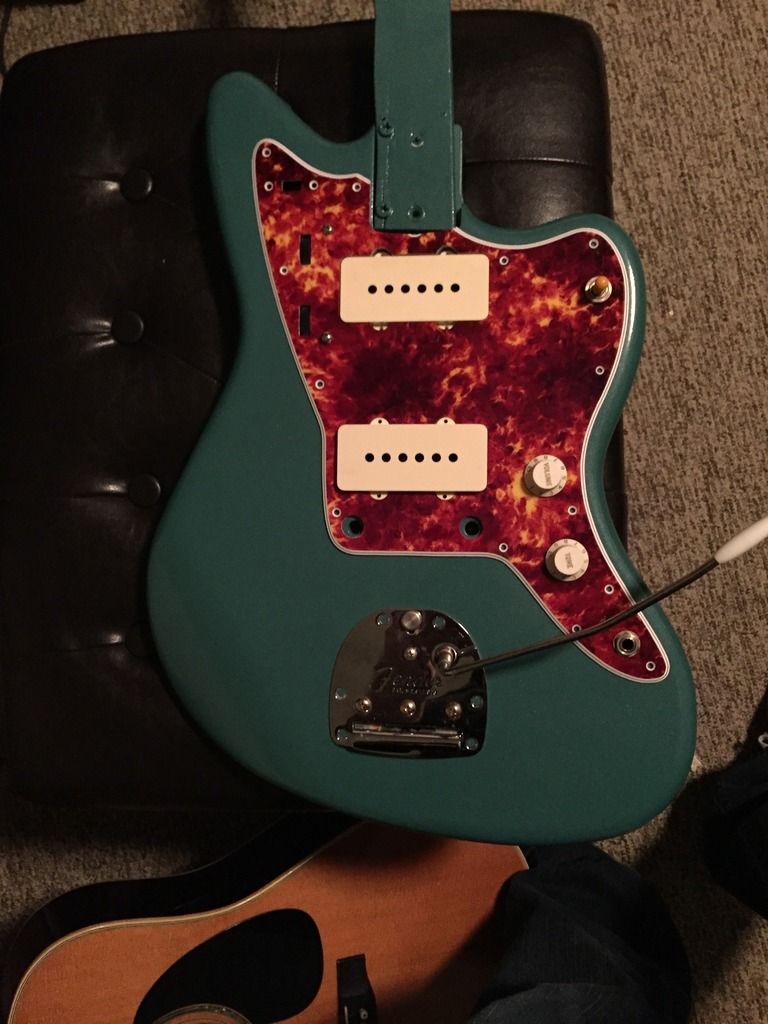
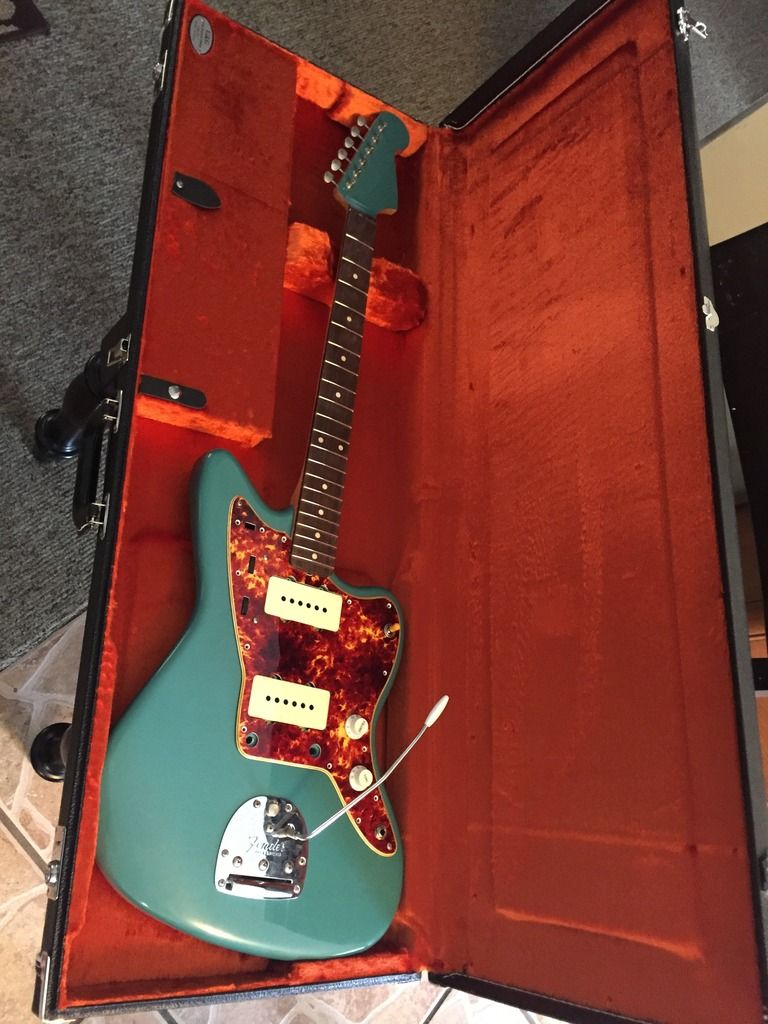
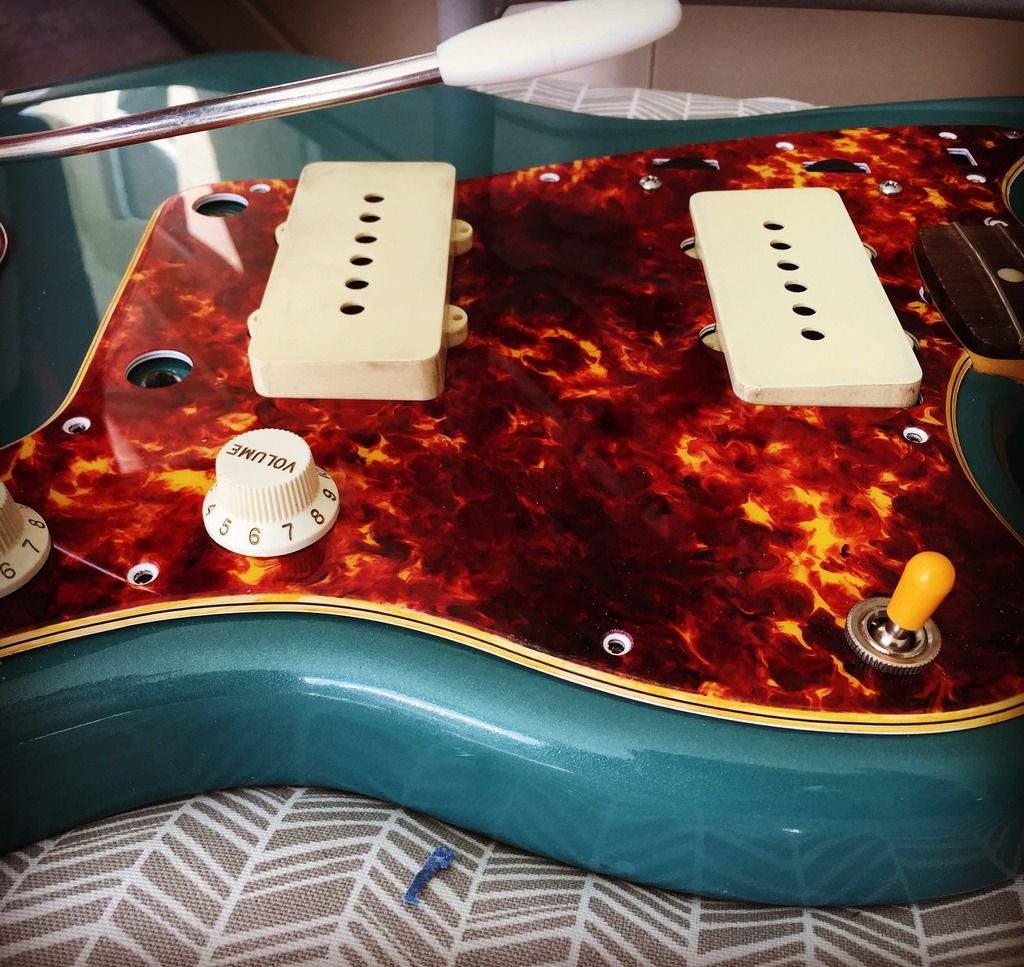
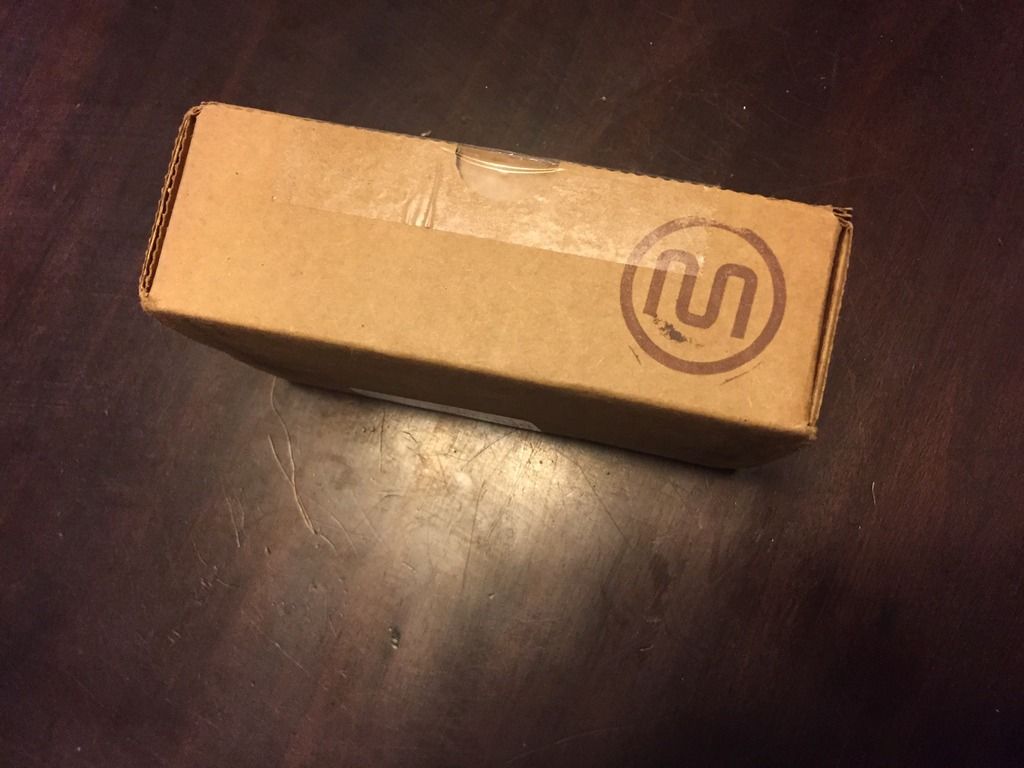
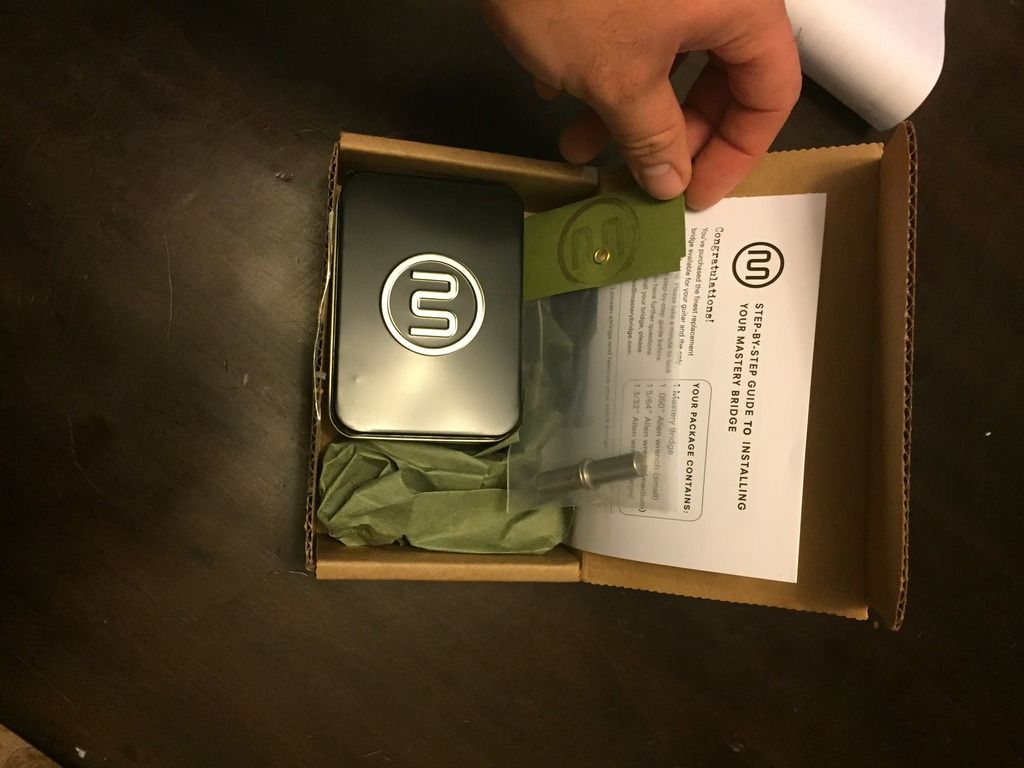
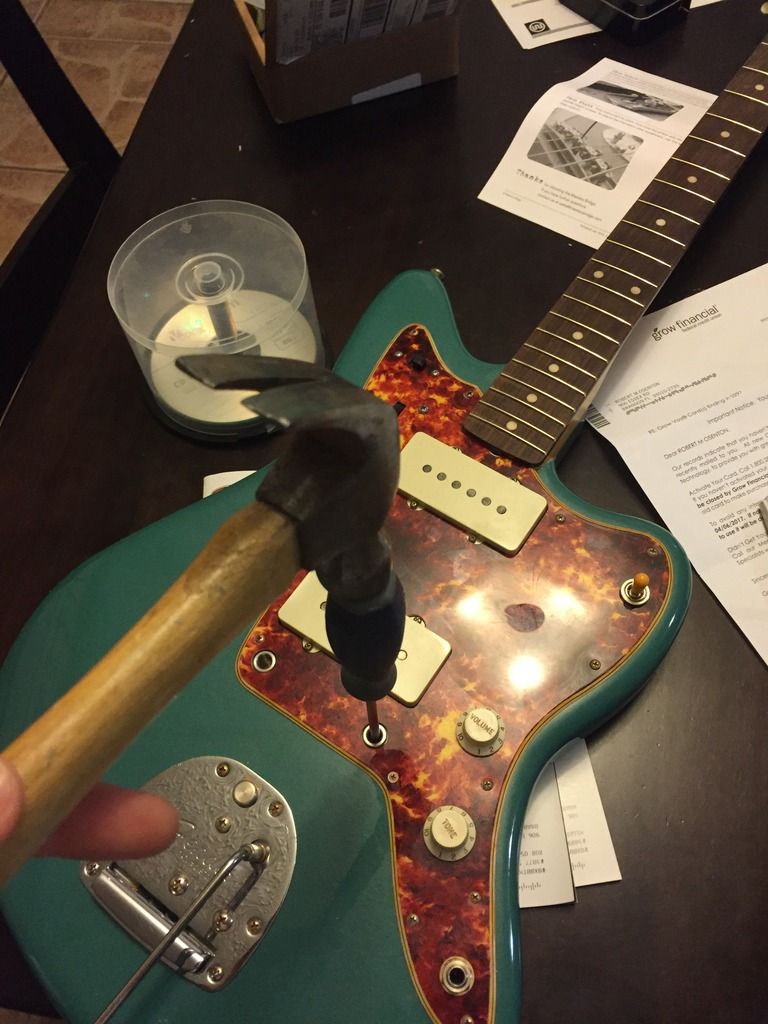
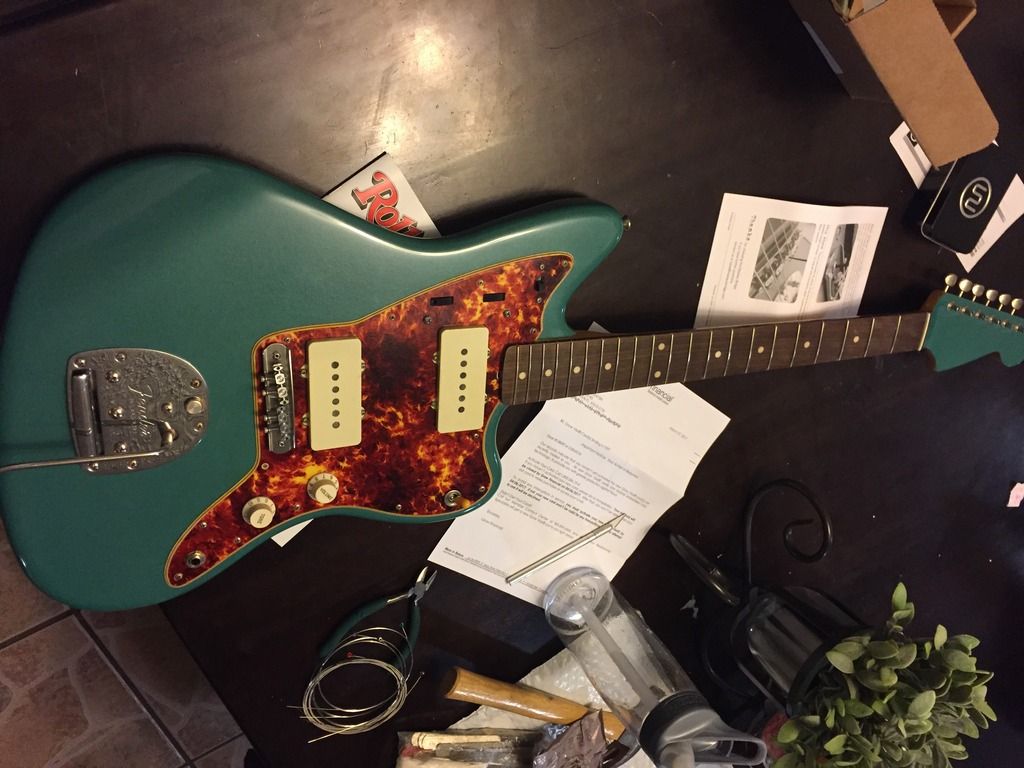
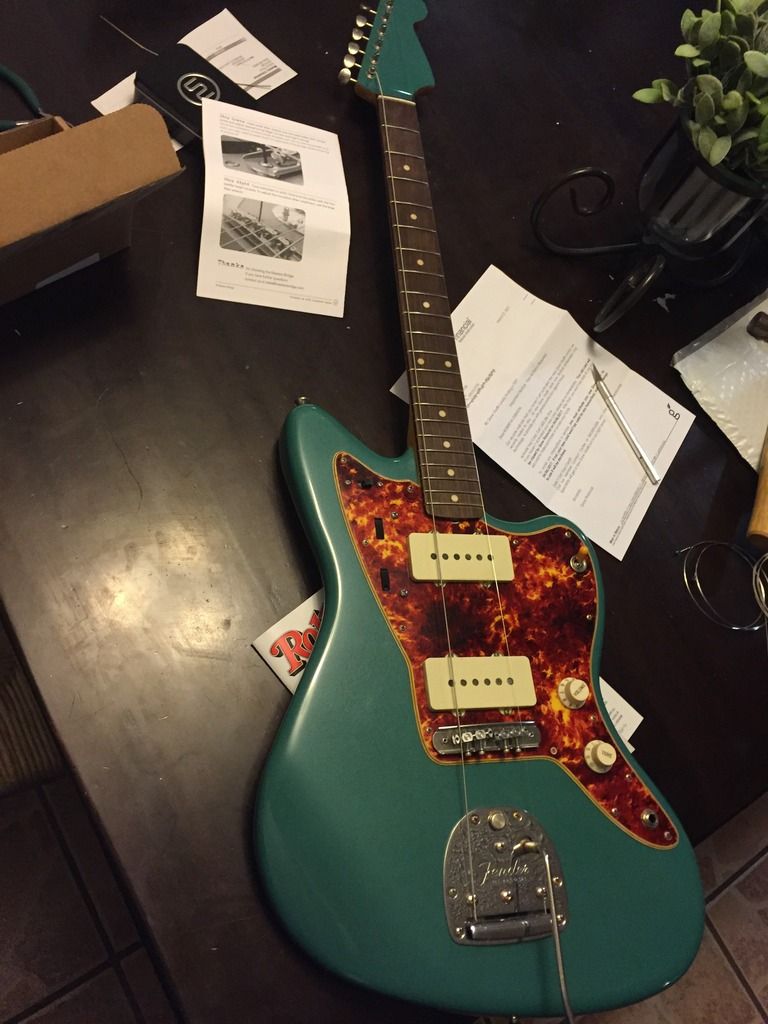
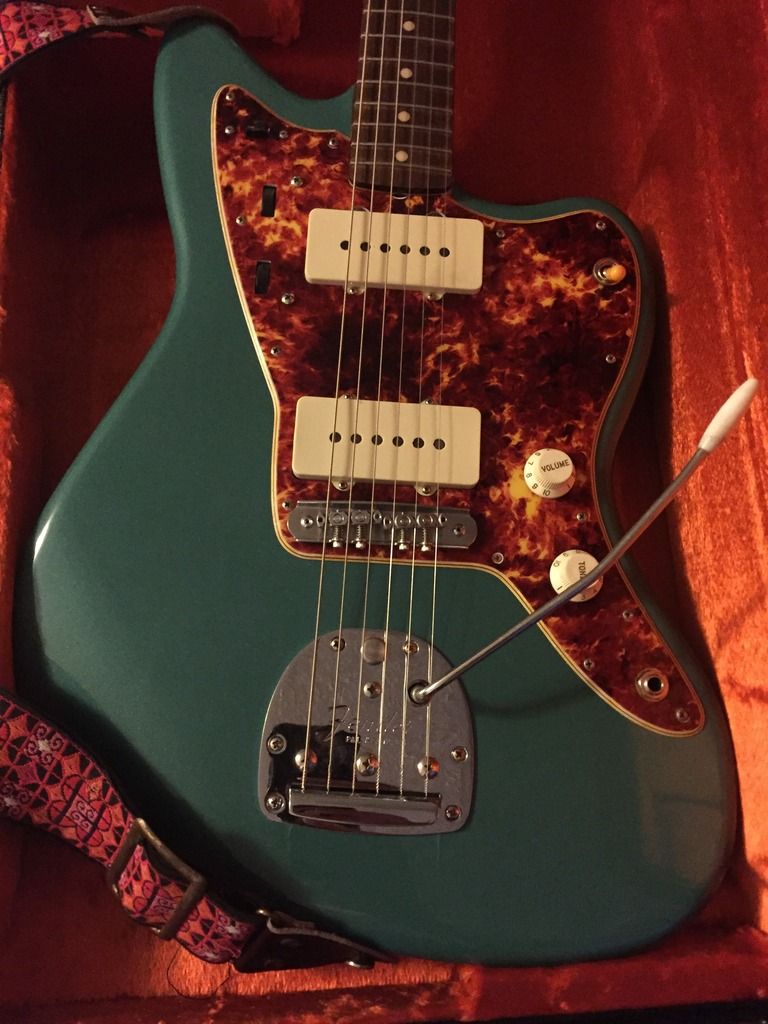
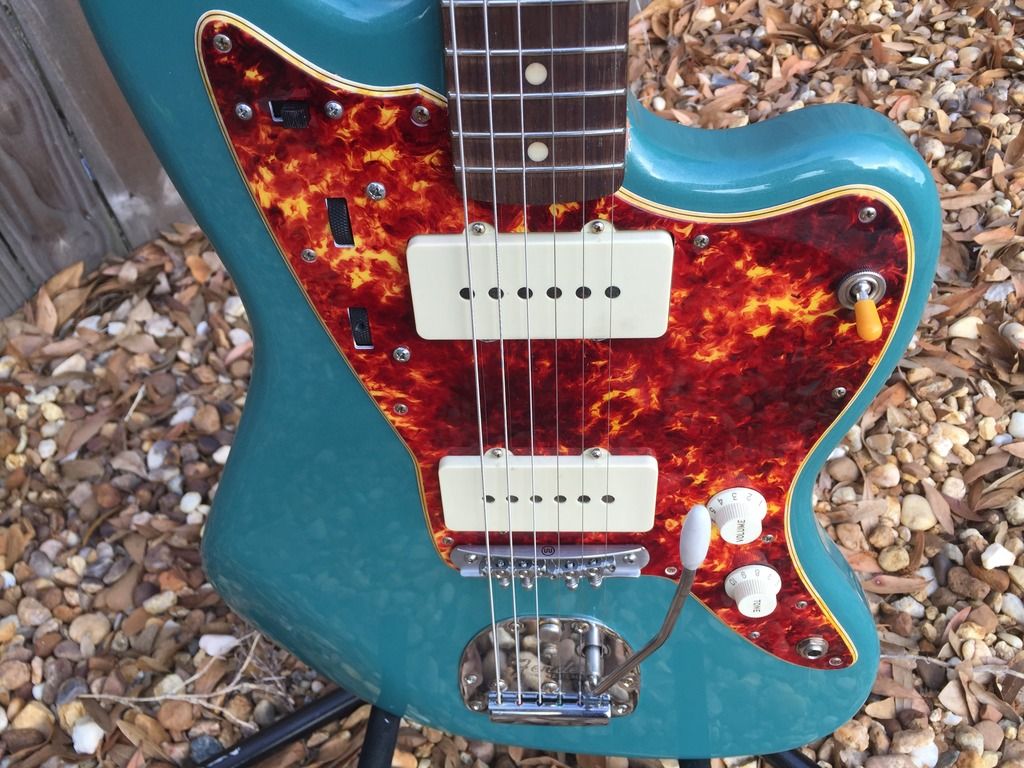
At this point, I decided to go big or go home, and ordered a spitfire guard and a mastery bridge!
I also ordered more paint, and ended up with this:
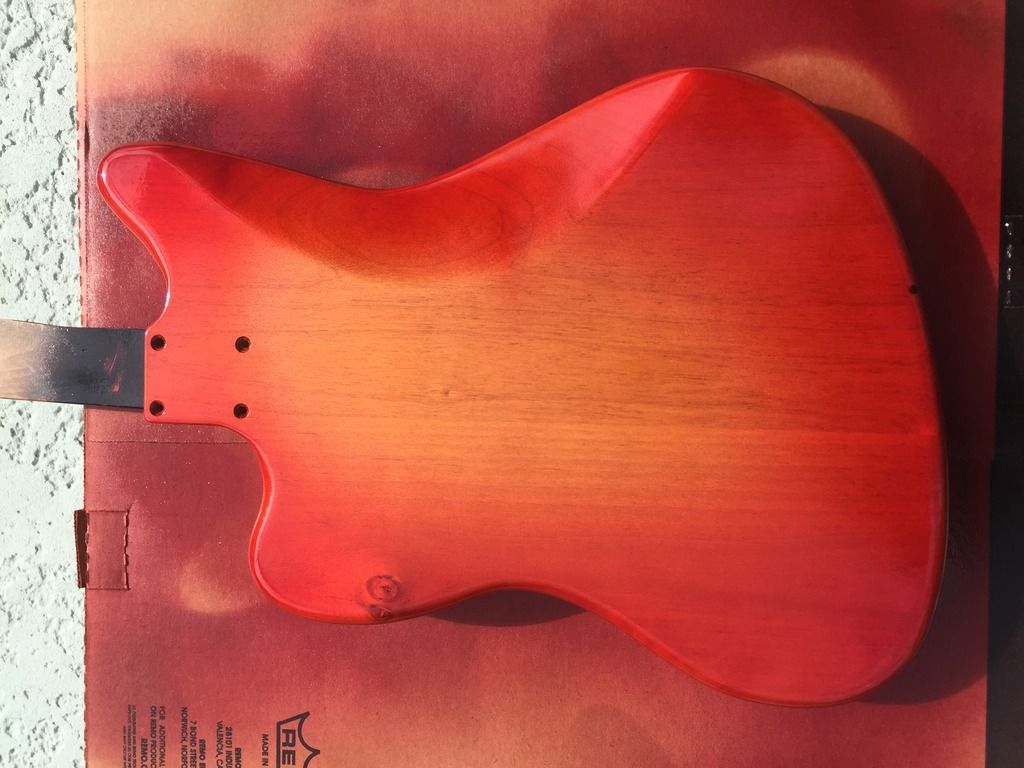
So how long should I wait to sand this out?
- Rockinrob86
- PAT PEND
- Posts: 24
- Joined: Tue Sep 11, 2012 7:56 am
Re: Jazzmaster build!
Alright, I'll quit holding out.
Here's the Spitfire tort!
Still waiting on the Mastery. How long do I need to wait to start buffing? A Month??? It's been a week and I'm getting antsy...
Here's the Spitfire tort!
Still waiting on the Mastery. How long do I need to wait to start buffing? A Month??? It's been a week and I'm getting antsy...
- hpr_hpr
- PAT. # 2.972.923
- Posts: 434
- Joined: Fri Apr 03, 2015 9:48 am
Re: Jazzmaster build!
With that many coats . . . a month minimum I'd say, 8 weeks if you want to be safe probably . . . I don't think you want to start over. AND it depends on the temp (and possibly humidity) in you locale, colder temps, longer curing time. For the one I did I waited a month but that was the middle of the summer here is OR . . . pretty dry and 25-30°C (85-95°F).
Someone else may have a better idea.
When thinking about any advice given always ask yourself "why would (s)he know more than I do".
- Rockinrob86
- PAT PEND
- Posts: 24
- Joined: Tue Sep 11, 2012 7:56 am
Re: Jazzmaster build!
Lost patience, decided to buff it out! Now I'm just waiting on the mastery...
Shielded
Wired!
Shielded
Wired!
- bacca51
- PAT. # 2.972.923
- Posts: 377
- Joined: Wed Apr 27, 2016 5:14 pm
Re: Jazzmaster build!
looks amazing, I've considered building this exact combo of pickguard and finish
- mordecainyc
- PAT. # 2.972.923
- Posts: 495
- Joined: Sun Jun 05, 2011 1:13 pm
- Location: Amsterdam
Re: Jazzmaster build!
Looks very good! Nice build! The Spitfire tort really shines on this one.
- Rockinrob86
- PAT PEND
- Posts: 24
- Joined: Tue Sep 11, 2012 7:56 am
Re: Jazzmaster build!
I'm really excited to play it!
I also cut the nut over the weekend, so as soon as the bridge comes in I can put strings on, slot the nut for the strings, put a string tree in and be off to the races!
I had a couple problems buffing it out... When I wetsanded it looks like the water got under the finish and caused cracks in a couple spots. The worst is around the tuner holes on the headstock
I wasn't going to start over, so I moved into relic mode. Aged the pickguard and the metal parts a bit, and just went with it.
Despite the amount of paint I used (4 cans of clear for body and neck), the finish is actually really thin - thinner than a sheet of paper, so with my clumsiness and playing style it will look vintage in no time - I think it already does a bit.
This has been a fun project, and I've really learned a lot! It's my 7th build, but first where I finished the body.
Speaking of, I tested it plugged in, and it really hums a lot on both the neck and bridge positions. The center is silent. I would say it is about 50% more hum than my strat has when not touching the strings. Is there anything else I can do? I don't mind some hum, but I would like to get it as good as it can be...
Is the shielding more of a "Every little bit helps" thing, or more of a "waterproofing in a submarine" scenario? There are a few small gaps in the copper shielding, I ran out of tape. I'm also thinking of maybe replacing the two long wire runs with shielded wire or also possibly getting more tape and shielding inside the pickup covers. Thoughts?
- Beef Bonanza
- PAT PEND
- Posts: 44
- Joined: Fri Jan 06, 2017 3:11 pm
Re: Jazzmaster build!
This thing really looks great. I really like the color combination with the body and the spitfire... perfect.
- Spitfire7
- PAT. # 2.972.923
- Posts: 1858
- Joined: Mon Aug 24, 2009 10:43 pm
- Location: Los Angeles, California USA
- Contact:
Re: Jazzmaster build!
Oh wow, did didn't know about your build until just now. That looks spectacular! Thanks for sharing. Saving pics now lol.
There's only one who makes the best vintage tortoise shell pickguards. Spitfire Tort.
http://spitfiretortoiseshellpickguards.wordpress.com/
- Rockinrob86
- PAT PEND
- Posts: 24
- Joined: Tue Sep 11, 2012 7:56 am
Re: Jazzmaster build!
I'm going to get you some fancy finished pics for your website, haha, not these rough ones!
- Rgand
- PAT. # 2.972.923
- Posts: 1171
- Joined: Sun Mar 05, 2017 3:55 pm
Re: Jazzmaster build!
Boy, that really came out great. Nice job.
- Rockinrob86
- PAT PEND
- Posts: 24
- Joined: Tue Sep 11, 2012 7:56 am
Re: Jazzmaster build!
The mastery is on the way! I'm going out of town for a few days, but will be back Sunday - it should be here Saturday, so hopefully by Monday I'll be jamming on the new JM!
- Rockinrob86
- PAT PEND
- Posts: 24
- Joined: Tue Sep 11, 2012 7:56 am
Re: Jazzmaster build!
Look what came in the mail!!!
Installing the thimbles...
Mastery installed!
Setting the string spacing. I didn't take pictures of slotting the nut, but I did that too
All done!
Outside the next morning...
It's a really great guitar. Very alive feeling and versatile sounding. I think I'm going to change the volume pot to a vintage taper (in between audio and linear), I like those better because the cleanup is more gradual. I mistakenly oriented the pickups out of phase - I looked at pictures of vintage jazzmasters to put the solder joints on the pickups on the same side, but on the antiquity pickups it is actually supposed to go the other way, so I flipped the bridge pickup around and it was all better. I'm still learning what to do with this guitar, but it's been a lot of fun so far.
Set up the tremolo lock to work correctly, and it's feeling nice. The bar is a little stiffer to move than I would like, but I don't want to take it apart and adjust it yet. Happy to report it stays in tune awesomely, even with heavy tremolo use!
- PixMix
- PAT. # 2.972.923
- Posts: 1687
- Joined: Fri Aug 21, 2015 6:04 pm
Re: Jazzmaster build!
Big like!