Hi all,
Does anyone know an ideal mix to replicate the yellow stain as used on vintage Fender finishes?
I assume that it will be part thinners, part clear coat and a good deal of yellow dye thrown in.
I have some woodfiller on my guitar body, so I'm concerned that using too much thinner will hurt the filler.
Any suggestions?
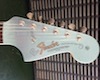
Yellow Stain Formula
-
scottme

- Expat

- Posts: 1107
- Joined: Tue Sep 12, 2006 6:57 pm
- Location: Newcastle
- Contact:
-
Marc
- Expat
- Posts: 1182
- Joined: Sat Sep 23, 2006 11:25 pm
- Location: South West UK
Re: Yellow Stain Formula
I would assume it's the transucent yellow used on sunbursts?
Yes the cat has opposing thumbs and extra digits.
-
scottme
- Expat
- Posts: 1107
- Joined: Tue Sep 12, 2006 6:57 pm
- Location: Newcastle
- Contact:
Re: Yellow Stain Formula
Yep, the one that's underneath so that they use less real paint.
-
scottme
- Expat
- Posts: 1107
- Joined: Tue Sep 12, 2006 6:57 pm
- Location: Newcastle
- Contact:
Re: Yellow Stain Formula
Anyone? Curtis? Doug? bumpety bump bump
-
JazzBlaster

- PAT. # 2.972.923

- Posts: 9474
- Joined: Tue Dec 26, 2006 1:34 pm
- Location: United States
- Contact:
Re: Yellow Stain Formula
everything you ever wanted to know about refinishing http://www.reranch.com/
It's not about the gear! It's about you, your hands, your imagination, your feelings.
-
thewizardofaz

- PAT. # 2.972.923
- Posts: 565
- Joined: Thu Oct 12, 2006 5:23 pm
- Location: Tucson, AZ U.S.A.
- Contact:
Re: Yellow Stain Formula
You got two options, actually 3. The body in the target burst was dipped in a vat of yellow dye. Or, you could wipe yellow stain (stew mac has some good stuff) mixed in alcohol until it's as yellow as you want it. Or, you could shoot clear lacquer with yelllow dye mixed in with it.
Rick
"Some people are like Slinkies . . . not really good for anything, but you still can’t help but smile when you see one tumble down the stairs."
"Some people are like Slinkies . . . not really good for anything, but you still can’t help but smile when you see one tumble down the stairs."
-
Stereordinary

- Expat
- Posts: 10660
- Joined: Fri Sep 15, 2006 11:55 am
- Location: Vancouver, WA USA
- Contact:
Re: Yellow Stain Formula
Fullerplast. The stuff, not Doug. At least when it's an Ash body, it was Fullerplast with yellow dye.
Rhoney Guitars, 2010-2017, 2024
-
CurtisNovak

- PAT. # 2.972.923
- Posts: 540
- Joined: Thu Oct 19, 2006 10:31 am
- Location: Yucca Valley, Ca
- Contact:
Re: Yellow Stain Formula
Sorry for the delay in responding... I have been traveling looking for a place to relocate my business and go full time. Looks like it will be North Carolina!!!
Anyway Stewmac's dye's are what i use to use, but they recently changed the medium brown to be brown and NOT red!!!! this really screwed things up.
Their yellow is still correct though.
To do a vintage correct finish this is the work flow...
Spray the Yellow on the raw wood.
Seal, Fullerplast is best as it is water clear and grain fills
Sand smooth
Spray the Tobacco brown band
Then spray the Medium Brown.
Then clear coats
This order will create the correct wear layers over time.
I add a touch of clear lacquer to the dyes to grip but not create a thick layer.
When you put the Medium brown over the tobbaco it turns the tobbaco black and gives it the correct redish halo and depth and makes the transition smoother.
Stewmac gets their colors from Homestead so you can go there to get the correct medium brown... I think they call it Mahogany for something
hope that helps...
Gonads are useful for their purpose, but are NO substitute for brains.
---
[url=http://www.myspace.com/curtisnovak]www.myspace.com/curtisnovak
---
[url=http://www.myspace.com/curtisnovak]www.myspace.com/curtisnovak
-
thewizardofaz
- PAT. # 2.972.923
- Posts: 565
- Joined: Thu Oct 12, 2006 5:23 pm
- Location: Tucson, AZ U.S.A.
- Contact:
Re: Yellow Stain Formula
Exactly! I forgot the fullerplast step. Homoclad was also used. That's what gives it that opaqued yellow center. If you've got nice grained wood, you might want to just grain fill with natural or just use lacquer. Then shoot a yellow shader, then the red, then the mahogany. Oddly enough, red mahogany stain on a yellow shaded finish will appear both red and dark brown like here
Rick
"Some people are like Slinkies . . . not really good for anything, but you still can’t help but smile when you see one tumble down the stairs."
"Some people are like Slinkies . . . not really good for anything, but you still can’t help but smile when you see one tumble down the stairs."
-
CurtisNovak
- PAT. # 2.972.923
- Posts: 540
- Joined: Thu Oct 19, 2006 10:31 am
- Location: Yucca Valley, Ca
- Contact:
Re: Yellow Stain Formula
Please dont take offence if I disagree w/ most of what you have said here, as much is a common myth that was started and spread around by people that never did much if any finish work.thewizardofaz wrote: Exactly! I forgot the fullerplast step. Homoclad was also used. That's what gives it that opaqued yellow center. If you've got nice grained wood, you might want to just grain fill with natural or just use lacquer. Then shoot a yellow shader, then the red, then the mahogany. Oddly enough, red mahogany stain on a yellow shaded finish will appear both red and dark brown like here
Homoclad was used in the 50's before they switched to Fullerplast this was back when the bursts had a very translucent yellow.
The simi opaque yellow was used in the 60's when they were they were net being hear as selective on the joints. It was done to disguise the grain mismatches.
The way the did the the simi opaque yellow was they mixed their yellow dye w/ their white paint thy used for their Blonde finishes.
Fender only dipped the bodies in the translucent yellow dye, they sprayed the simi opaque yellow b/c they had to control the flow to keep it from being opaque just like their Blondes.
I would strongly suggest you not use lacquer as a grain filler as it is SO unstable it will start sinking into the grain in a few months. The secret of Fullerplast is it has a catalyzing hardener in it and is ROCK hard. So when you spray it on is soaks into the wood grain and hardens then when you sand you will get a hard flat surface that your lacquer can lay on. The problem w/ using lacquer as a sealer is 2 fold first lacquer never really gets fully stable it is forever gassing off and getting thinner and thinner over time meaning it sinks into the grain if you use it as a filler. Secondly lacquer is designed to soften the prior finish layer so the new coat will melt into it creating a single bond. What this means is if you sand your sub finish smooth and spray for next or finish coat over that it melts your base never giving you a solid foundation.
Also I strongly suggest if you have a nice grained piece of wood you put the yellow on the RAW wood UNDER the sealer as it greatly enhances the grain b/c it soaks in to the wood and created much more depth and character, if you spray the yellow over the sealer it simply creates a yellow tint. The reason medium brown (red mahogany) does what it does is is is rather translucent that is why it is your last band.
Most finishers get this wrong and do the yellow, then the medium brown, then the tobacco brown. The problem w/ this is the tobacco is meant to spray opaque and when you spray this over the medium you end up w/ a slight band where the Tobacco stops, also the tobacco is a DARK brown not black so w/ this method the outer band is brown, and is missing the reddish halo that the medium creates. On another side note the original bursts that had the simi opaque yellow centers were not as drastic as they are now, now days they remind me of the way my grandma use to put on rouge... This effect happened over time as the white pigment has become more prominent as the aniline dyes have faded.
hope that helps...
Gonads are useful for their purpose, but are NO substitute for brains.
---
[url=http://www.myspace.com/curtisnovak]www.myspace.com/curtisnovak
---
[url=http://www.myspace.com/curtisnovak]www.myspace.com/curtisnovak
-
scottme
- Expat
- Posts: 1107
- Joined: Tue Sep 12, 2006 6:57 pm
- Location: Newcastle
- Contact:
Re: Yellow Stain Formula
Wow, thanks Curtis!
I decided to go the DIY path (it sounds like you're overloaded Curtis).
I have save part of the original yellow stain complete with initials, so I am thinking that I'd likr to re-stain the rest of the body yellow, put sand a seal down (mine is white, getting Fullerplast would be ttricky in oz). I then would lay down white and clears. I have coated the woodfiller in a light clear coat. So I guess I experiment with some clear / thinner / dye mixes. I figure I will just brush it on. (in absense of spray gear for the first part of the job).
I wouldn't try a 3TS as I haven't really seen any that look convincing enough.
-
glimmertwin
- PAT. # 2.972.923
- Posts: 3371
- Joined: Tue Oct 17, 2006 11:21 am
- Location: Austin, TX
Re: Yellow Stain Formula
...hey Curtis - while we have your attention, have you had any experience with this brand of fullerplast? I think I saw it referenced somewhere either on project guitar or reranch's archives.
http://www.van-dee.com/clear.htm
Best of luck on the move!
http://www.van-dee.com/clear.htm
Best of luck on the move!
"I enjoy the current state of offsetguitars hostility."
-
CurtisNovak
- PAT. # 2.972.923
- Posts: 540
- Joined: Thu Oct 19, 2006 10:31 am
- Location: Yucca Valley, Ca
- Contact:
Re: Yellow Stain Formula
Yeah that looks right... I get mine for the mfg Gemini Coatings from Oklahoma, but I dont think they sell to the general public.glimmertwin wrote: ...hey Curtis - while we have your attention, have you had any experience with this brand of fullerplast? I think I saw it referenced somewhere either on project guitar or reranch's archives.
http://www.van-dee.com/clear.htm
Best of luck on the move!
Just make sure you get the gloss.
Gonads are useful for their purpose, but are NO substitute for brains.
---
[url=http://www.myspace.com/curtisnovak]www.myspace.com/curtisnovak
---
[url=http://www.myspace.com/curtisnovak]www.myspace.com/curtisnovak
-
TheMilford

- Expat
- Posts: 738
- Joined: Mon Sep 25, 2006 7:29 am
- Location: Brooklyn , NY
- Contact:
Re: Yellow Stain Formula
Hmm... to use gloss or satin?
http://seasonfinale.bandcamp.com/
http://www.tronographic.com/
http://www.tronographic.com/
-
thewizardofaz
- PAT. # 2.972.923
- Posts: 565
- Joined: Thu Oct 12, 2006 5:23 pm
- Location: Tucson, AZ U.S.A.
- Contact:
Re: Yellow Stain Formula
CurtisNovak wrote:Please dont take offence if I disagree w/ most of what you have said here, as much is a common myth that was started and spread around by people that never did much if any finish work.thewizardofaz wrote: Exactly! I forgot the fullerplast step. Homoclad was also used. That's what gives it that opaqued yellow center. If you've got nice grained wood, you might want to just grain fill with natural or just use lacquer. Then shoot a yellow shader, then the red, then the mahogany. Oddly enough, red mahogany stain on a yellow shaded finish will appear both red and dark brown like here
Homoclad was used in the 50's before they switched to Fullerplast this was back when the bursts had a very translucent yellow.
--I've read in several web sites where they're as saying Homoclad up until about 1962-3. I don't know, actually. Only what I've read. The posts indicated homoclad and fullerplast were used at sometimes when they'd run out of one, they'd use the other, which would fit in with what Leo was about, cutting costs.
The simi opaque yellow was used in the 60's when they were they were net being hear as selective on the joints. It was done to disguise the grain mismatches.
--Sorry..that is my fault. I don't even know what I was trying to say there about the opaqued. My very very bad.
The way the did the the simi opaque yellow was they mixed their yellow dye w/ their white paint thy used for their Blonde finishes.
Fender only dipped the bodies in the translucent yellow dye, they sprayed the simi opaque yellow b/c they had to control the flow to keep it from being opaque just like their Blondes.
I would strongly suggest you not use lacquer as a grain filler as it is SO unstable it will start sinking into the grain in a few months. The secret of Fullerplast is it has a catalyzing hardener in it and is ROCK hard. So when you spray it on is soaks into the wood grain and hardens then when you sand you will get a hard flat surface that your lacquer can lay on.
---I use grain filler sometimes, sometimes I use FP. I prefer FP as it sands better and gives a flatter, harder surface.
The problem w/ using lacquer as a sealer is 2 fold first lacquer never really gets fully stable it is forever gassing off and getting thinner and thinner over time meaning it sinks into the grain if you use it as a filler. Secondly lacquer is designed to soften the prior finish layer so the new coat will melt into it creating a single bond. What this means is if you sand your sub finish smooth and spray for next or finish coat over that it melts your base never giving you a solid foundation.
---I don't do the lacquer as a sealer coat, sometimes sanding sealer, but never just lacquer. I just mentioned it because Dan Erlewine mentions in both of his finishing books (or I believe I read it there..could be wrong). I'm aware of the melting effect, that's what makes lacquer so nice, at least for me, because you sand off the high spots, shoot and the low spots get filled in and the higher spots melt down.
Also I strongly suggest if you have a nice grained piece of wood you put the yellow on the RAW wood UNDER the sealer as it greatly enhances the grain b/c it soaks in to the wood and created much more depth and character, if you spray the yellow over the sealer it simply creates a yellow tint. The reason medium brown (red mahogany) does what it does is is is rather translucent that is why it is your last band.
--Dint think of that, at least staining yellow first. Often what I will do is stain brown and then sand off to almost a white body, which leaves just a tad in the grain, which enhances the figure when the shader is applied. I usually do that only on quilt though. It seems to make the 3d effect more pronounced.
Most finishers get this wrong and do the yellow, then the medium brown, then the tobacco brown. The problem w/ this is the tobacco is meant to spray opaque and when you spray this over the medium you end up w/ a slight band where the Tobacco stops, also the tobacco is a DARK brown not black so w/ this method the outer band is brown, and is missing the reddish halo that the medium creates.
--If I'm doing tobacco, I don't use any other colors except having the wood stained yellow or a shader. Just depends on how I feel on a given day as to which. It saves time also to stain the wood first, then the tobacco. You don't have the extra shader step.
On another side note the original bursts that had the simi opaque yellow centers were not as drastic as they are now, now days they remind me of the way my grandma use to put on rouge... This effect happened over time as the white pigment has become more prominent as the aniline dyes have faded.
--That makes sense also.
hope that helps...
Rick
"Some people are like Slinkies . . . not really good for anything, but you still can’t help but smile when you see one tumble down the stairs."
"Some people are like Slinkies . . . not really good for anything, but you still can’t help but smile when you see one tumble down the stairs."